

的云计算管理平台项目,是一系列开源的。为私有云和公有云提供可扩展的弹性的。下面良许教程网为大家分享一下Linux系统部署OpenStack的详细步骤,有需要的朋友可以参考一下。

OpenStack简介:
-
OpenStack 是当今最具影响力的管理工具——通过命令或者基于 Web 的可视化控制面板来管理 IaaS 云端的资源池(服务器、存储和网络)。
-
它最先由美国国家航空航天局(NASA)和 Rackspace 在 2010 年合作研发,现在参与的人员和组织汇集了来自 100 多个国家的超过 9500 名的个人和 850 多个世界上赫赫有名的企业,如 NASA、谷歌、惠普、Intel、IBM、微软等。
实验环境(rhel7.3版本)
1、selinux和firewalld状态为disabled
2、各主机信息如下:
| 主机 | ip |
|---|---|
| server1(控制节点—controller)。内存至少2G | 172.25.83.1 |
| server2(计算节点—compute)。内存至少2G | 172.25.83.1 |
3、可以将openstack的帮助文档,全部下载到本地,然后放到httpd服务的默认发布目录下,进行查看。
[root@foundation83 ~]# ll /var/www/html/ total 12 drw-r--r--. 5 root root 4096 Apr 18 16:53 install-guide-rdo dr-xr-xr-x. 10 root root 4096 Oct 20 2016 rhel7.3 [root@foundation83 ~]# chmod -R go+x /var/www/html/install-guide-rdo/ #该该目录赋予可读的权限 [root@foundation83 ~]# ll /var/www/html/ total 12 drw-r-xr-x. 5 root root 4096 Apr 18 16:53 install-guide-rdo dr-xr-xr-x. 10 root root 4096 Oct 20 2016 rhel7.3
-
浏览器进行访问
五、Openstack安装部署私有云
配置控制节点:
1、环境
主机网络
(1)配置网络接口
【1】、添加一块网卡:
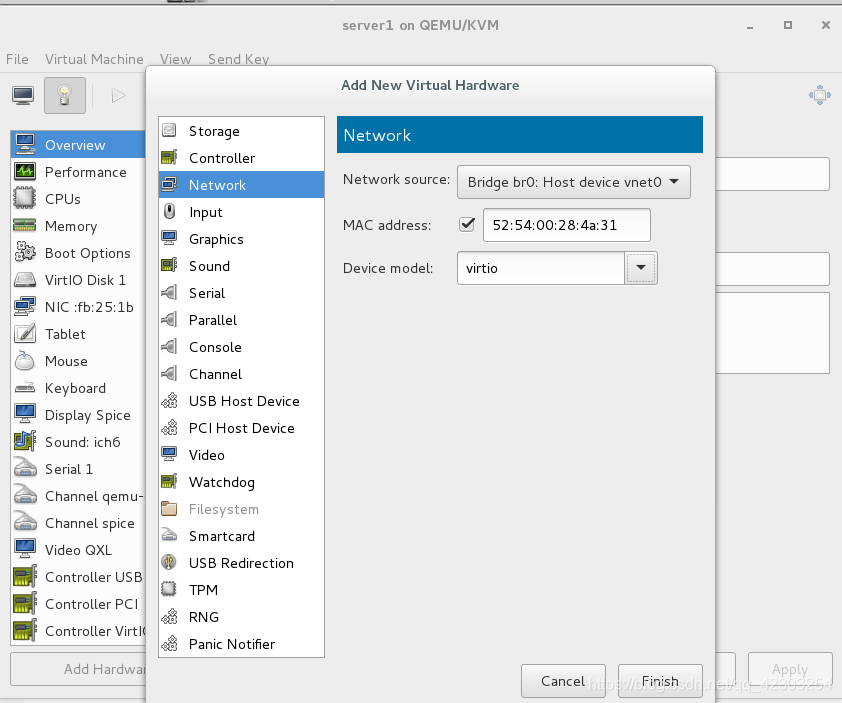
[root@server1 ~]# ip a #两块网卡(eth0和eth1) 1: lo:mtu 65536 qdisc noqueue state UNKNOWN qlen 1 link/loopback 00:00:00:00:00:00 brd 00:00:00:00:00:00 inet 127.0.0.1/8 scope host lo valid_lft forever preferred_lft forever inet6 ::1/128 scope host valid_lft forever preferred_lft forever 2: eth0: mtu 1500 qdisc pfifo_fast state UP qlen 1000 link/ether 52:54:00:fb:25:1b brd ff:ff:ff:ff:ff:ff inet 172.25.83.1/24 brd 172.25.83.255 scope global eth0 valid_lft forever preferred_lft forever inet6 fe80::5054:ff:fefb:251b/64 scope link valid_lft forever preferred_lft forever 3: eth1: mtu 1500 qdisc noop state DOWN qlen 1000 link/ether 52:54:00:28:4a:31 brd ff:ff:ff:ff:ff:ff
【2】、将第一个接口配置为管理网络接口:
[root@server1 ~]# cd /etc/sysconfig/network-scripts/ [root@server1 network-scripts]# vim ifcfg-eth0 1 BOOTPROTO=none 2 NAME=eth0 3 DEVICE=eth0 4 ONBOOT=yes 5 IPADDR=172.25.83.1 6 NETMASK=255.255.255.0 7 GATEWAY=172.25.83.83 8 DNS1=114.114.114.114
【3】、提供者网络接口使用一个特殊的配置,不分配给它IP地址。并进行激活
[root@server1 network-scripts]# cp ifcfg-eth0 ifcfg-eth1 [root@server1 network-scripts]# vim ifcfg-eth1 1 BOOTPROTO=none 2 DEVICE=eth1 3 ONBOOT=yes [root@server1 network-scripts]# ifup eth1 #激活eth1网卡 [root@server1 network-scripts]# ip addr show eth1 3: eth1:mtu 1500 qdisc pfifo_fast state UP qlen 1000 link/ether 52:54:00:28:4a:31 brd ff:ff:ff:ff:ff:ff inet6 fe80::5054:ff:fe28:4a31/64 scope link valid_lft forever preferred_lft forever
(2)配置域名解析
【1】、设置节点主机名为 controller。
[root@server1 ~]# hostnamectl set-hostname controller [root@server1 ~]# logout Connection to 172.25.83.1 closed. [student@foundation83 ~]$ ssh root@172.25.83.1 root@172.25.83.1's password: [root@controller ~]# hostname controller
【2】、编辑 /etc/hosts 文件包含以下内容:
[root@controller ~]# vim /etc/hosts 172.25.83.1 controller 172.25.83.2 compute1 172.25.83.3 block1
网络时间协议(NTP)
(1)安全并配置组件
我这里配置虚拟机server1和server2同步我的物理机
#配置物理机,允许其他主机同步该物理机的时间 [root@foundation83 ~]# vim /etc/chrony.conf #将第22行修改为如下的内容,允许172.25网段的主机同步该主机 22 allow 172.25/16 [root@foundation83 ~]# systemctl restart chronyd.service #修改万配置文件之后,重启chronyd服务 [root@foundation83 ~]# systemctl enable chronyd.service #设置chronyd服务开机自启
【1】、安装软件包:
[root@controller ~]# yum install chrony -y
【2】、编辑 /etc/chrony.conf 文件:
[root@controller ~]# vim /etc/chrony.conf #删除第4行,第5行,第6行;并将第3行改为如下的内容 3 server 172.25.83.83 iburst
【3】、启动chronyd服务并将其配置为随系统启动:
[root@controller ~]# systemctl restart chronyd [root@controller ~]# chronyc sources -v #查看是否同步成功 210 Number of sources = 1 .-- Source mode '^' = server, '=' = peer, '#' = local clock. / .- Source state '*' = current synced, '+' = combined , '-' = not combined, | / '?' = unreachable, 'x' = time may be in error, '~' = time too variable. || .- xxxx [ yyyy ] +/- zzzz || Reachability register (octal) -. | xxxx = adjusted offset, || Log2(Polling interval) --. | | yyyy = measured offset, || \ | | zzzz = estimated error. || | | \ MS Name/IP address Stratum Poll Reach LastRx Last sample =============================================================================== ^* foundation83.ilt.example. 3 6 17 2 -4352ns[+1000ns] +/- 123ms [root@controller ~]# systemctl enable chronyd [root@controller ~]# systemctl is-enabled chronyd #判断chronyd服务是否开机自启 enabled
Openstack包
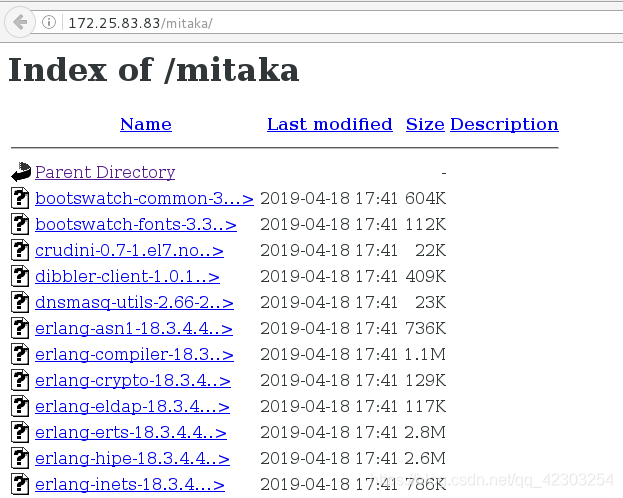
将有关Openstack软件包mitaka目录(在网上下载的)放置在httpd服务的默认发布目录/var/www/html目录下
[root@foundation83 ~]# ll -d /var/www/html/mitaka/ drwx------. 3 root root 16384 Apr 18 17:41 /var/www/html/mitaka/ [root@foundation83 ~]# chmod -R go+rx /var/www/html/mitaka/ [root@foundation83 ~]# ll -d /var/www/html/mitaka/ drwxr-xr-x. 3 root root 16384 Apr 18 17:41 /var/www/html/mitaka/
-
web界面进行访问,看能否访问到
(1)编辑yun源
[root@controller ~]# vim /etc/yum.repos.d/openstack.repo [openstack] name=mitaka baseurl=http://172.25.83.83/mitaka gpgcheck=0 [root@controller ~]# yum clean all [root@controller ~]# yum repolist dvd rhel7.3 4,751 openstack mitaka 279 repolist: 5,030
(2)安装Openstack软件包
[root@controller ~]# yum upgrade -y   #在主机上升级包

[root@controller ~]# yum install python-openstackclient -y   #安装 OpenStack 客户端
SQL数据库
(1)安全并配置组件
【1】、安装软件包:
[root@controller ~]# yum install mariadb mariadb-server python2-PyMySQL -y
【2】、创建并编辑 /etc/my.cnf.d/openstack.cnf,然后完成如下动作:
[root@controller ~]# vim /etc/my.cnf.d/openstack.cnf 1 [mysqld] 2 bind-address = 172.25.83.1 3 default-storage-engine = innodb 4 innodb_file_per_table 5 max_connections = 4096 6 collation-server = utf8_general_ci 7 character-set-server = utf8 #其中第二行表示:在 [mysqld] 部分,设置 ``bind-address``值为控制节点的管理网络IP地址以使得其它节点可以通过管理网络访问数据库: 3-7行表示:在``[mysqld]`` 部分,设置如下键值来启用一起有用的选项和 UTF-8 字符集:
(2)完成安装
【1】、启动数据库服务,并将其配置为开机自启:
[root@controller ~]# systemctl enable mariadb.service [root@controller ~]# systemctl start mariadb.service
【2】、为了保证数据库服务的安全性,运行mysql_secure_installation脚本。特别需要说明的是,为数据库的root用户设置一个适当的密码。
[root@controller ~]# mysql_secure_installation #第一个敲空格,其余均敲y
消息队列
(1)安全并配置组件
【1】、安装包:
[root@controller ~]# yum install rabbitmq-server -y
【2】、启动消息队列服务并将其配置为随系统启动:
[root@controller ~]# systemctl enable rabbitmq-server.service [root@controller ~]# systemctl start rabbitmq-server.service
【3】、添加 openstack 用户:
[root@controller ~]# rabbitmqctl add_user openstack openstack #设置openstack用户的密码为openstack Creating user "openstack" ...
【4】、给openstack用户配置写和读权限:
[root@controller ~]# rabbitmqctl set_permissions openstack ".*" ".*" ".*" Setting permissions for user "openstack" in vhost "/" ...
测试授权是否成功
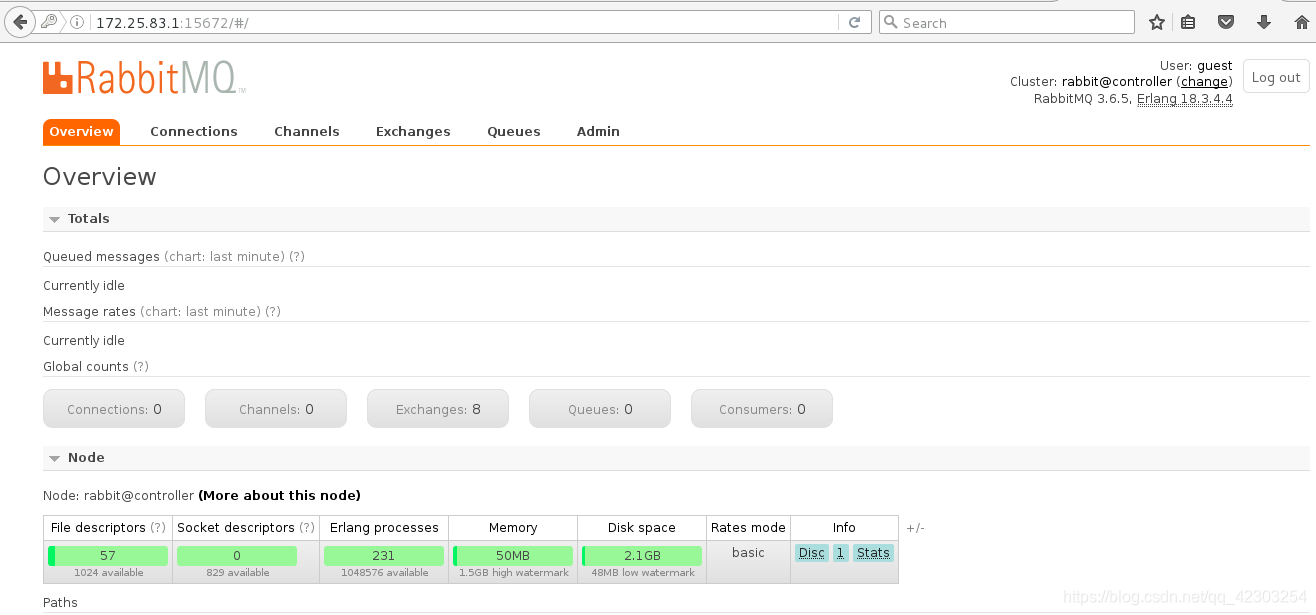
[root@controller ~]# rabbitmq-plugins enable rabbitmq_management

The following plugins have been enabled:

  mochiweb

  webmachine

  rabbitmq_web_dispatch

  amqp_client

  rabbitmq_management_agent

  rabbitmq_management


Applying plugin configuration to rabbit@controller... started 6 plugins.

[root@controller ~]# netstat -antulpe | grep 15672

tcp        0      0 0.0.0.0:15672           0.0.0.0:*               LISTEN      995        37418      12150/beam
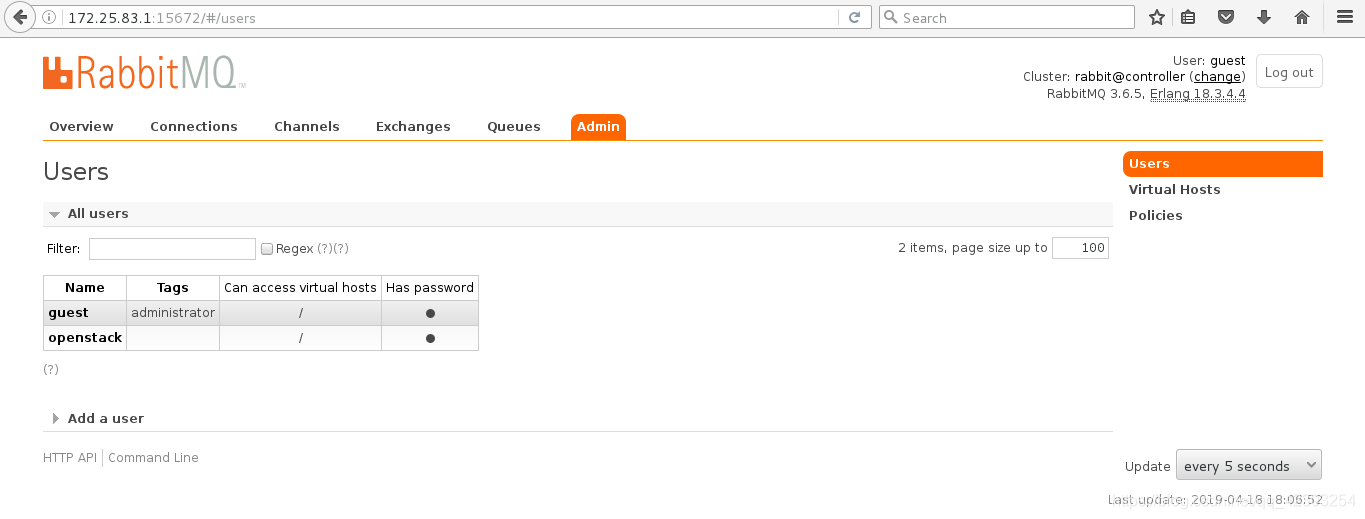
用户名guest,密码guest
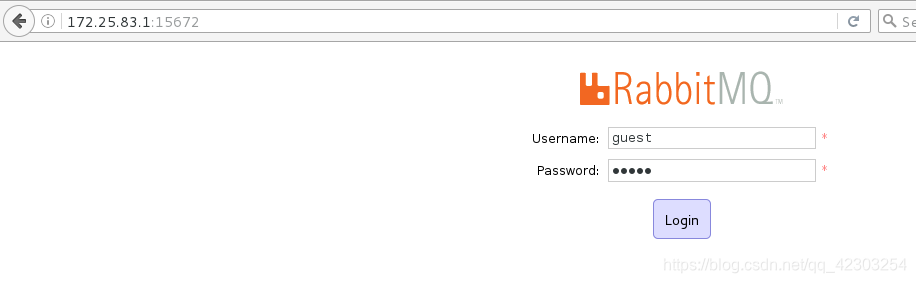
点击“Login”进行登陆
点击“Admin”
点击“openstack”
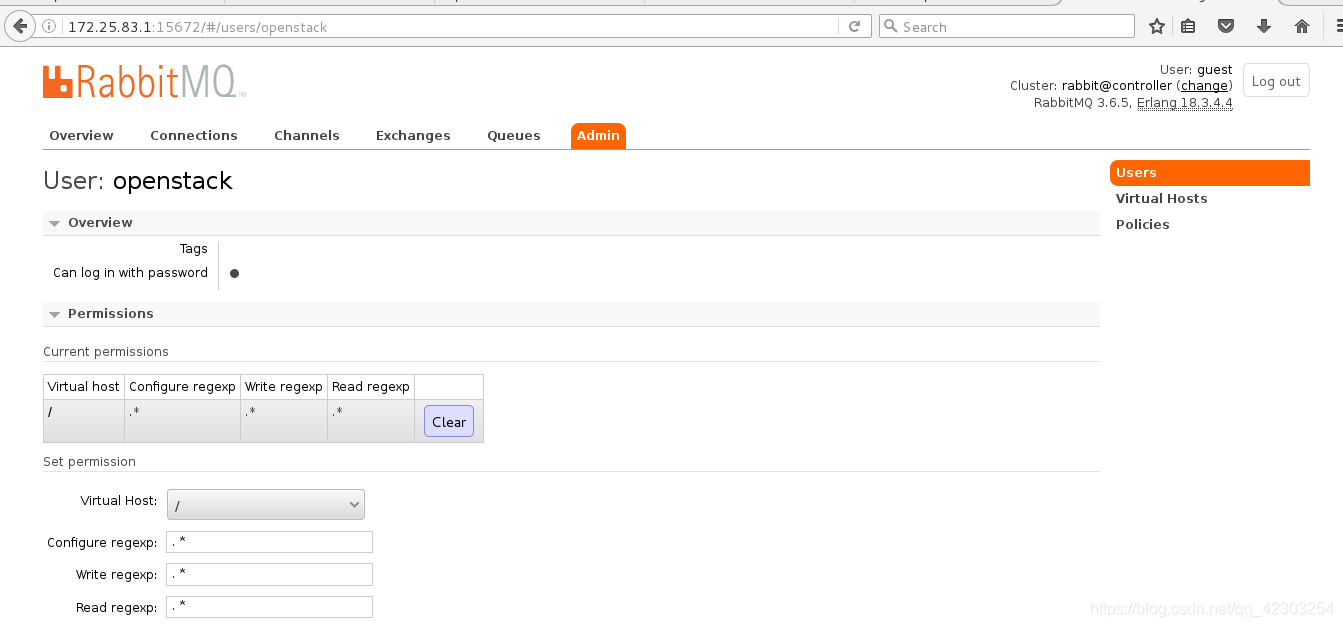
从上图,我们可以看到给openstack用户授权成功。
Memcached
(1)安全并配置组件
【1】、安装软件包:
[root@controller ~]# yum install memcached python-memcached -y
【2】、编辑配置文件/etc/sysconfig/memcached
[root@controller ~]# vim /etc/sysconfig/memcached #将其中的第5行进行注释即可 1 PORT="11211" 2 USER="memcached" 3 MAXCONN="1024" 4 CACHESIZE="64" 5 #OPTIONS="-l 127.0.0.1,::1"
(2)完成安装
【1】、启动Memcached服务,配置它随机启动,并查看11211端口是否打开
[root@controller ~]# systemctl enable memcached.service [root@controller ~]# systemctl start memcached.service [root@controller ~]# netstat -antulpe | grep 11211 tcp 0 0 0.0.0.0:11211 0.0.0.0:* LISTEN 994 38500 13127/memcached
2、配置认证服务
安装与配置
(1)先决条件
【1】、完成下面的步骤以创建数据库:
[root@controller ~]# mysql -u root -p #用数据库连接客户端以 root 用户连接到数据库服务器 Enter password: #输入密码 MariaDB [(none)]> CREATE DATABASE keystone; #创建 keystone 数据库: Query OK, 1 row affected (0.00 sec) MariaDB [(none)]> GRANT ALL PRIVILEGES ON keystone.* TO 'keystone'@'localhost' \ -> IDENTIFIED BY 'keystone'; #对``keystone``数据库授予恰当的权限 Query OK, 0 rows affected (0.00 sec) MariaDB [(none)]> GRANT ALL PRIVILEGES ON keystone.* TO 'keystone'@'%' IDENTIFIED BY 'keystone'; #对``keystone``数据库授予恰当的权限 Query OK, 0 rows affected (0.00 sec) MariaDB [(none)]> ^DBye #退出数据库客户端。
【2】、生成一个随机值在初始的配置中作为管理员的令牌。
[root@controller ~]# openssl rand -hex 10

ca34150208112479d7b3
(2)安全并配置组件
【1】、运行以下命令来安装包
[root@controller ~]# yum install openstack-keystone httpd mod_wsgi -y
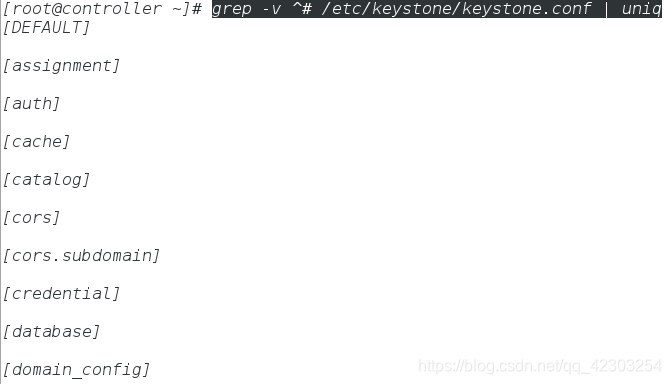
【2】、编辑文件 /etc/keystone/keystone.conf 并完成如下动作:
-
查看配置文件/etc/keystone/keystone.conf中有那些组件
[root@controller ~]# vim /etc/keystone/keystone.conf #在``[DEFAULT]``部分,定义初始管理令牌的值: [DEFAULT] admin_token = ca34150208112479d7b3 #在 [database] 部分,配置数据库访问: [database] connection = mysql+pymysql://keystone:keystone@controller/keystone #在``[token]``部分,配置Fernet UUID令牌的提供者。 [token] provider = fernet
【3】、初始化身份认证服务的数据库,并登陆数据库查看是否认证成功
[root@controller ~]# su -s /bin/sh -c "keystone-manage db_sync" keystone [root@controller ~]# mysql -uroot -p Enter password: MariaDB [(none)]> use keystone; MariaDB [keystone]> show tables; +------------------------+ | Tables_in_keystone | +------------------------+ | access_token | | assignment | | config_register | | consumer | | credential | | domain | | endpoint | | endpoint_group | | federated_user | | federation_protocol | | group | | id_mapping | | identity_provider | | idp_remote_ids | | implied_role | | local_user | | mapping | | migrate_version | | password | | policy | | policy_association | | project | | project_endpoint | | project_endpoint_group | | region | | request_token | | revocation_event | | role | | sensitive_config | | service | | service_provider | | token | | trust | | trust_role | | user | | user_group_membership | | whitelisted_config | +------------------------+ 37 rows in set (0.00 sec) MariaDB [keystone]> ^DBye #按"Ctrl+d"退出数据库客户端
【4】、初始化Fernet keys,并测试是否初始化成功
[root@controller ~]# keystone-manage fernet_setup --keystone-user keystone --keystone-group keystone [root@controller ~]# cd /etc/keystone/ #该目录下生成了fernet-keys目录,表示初始化成功 [root@controller keystone]# ll total 100 -rw-r----- 1 root keystone 2303 Sep 22 2016 default_catalog.templates drwx------ 2 keystone keystone 24 Apr 18 19:50 fernet-keys -rw-r----- 1 root keystone 73221 Apr 18 19:42 keystone.conf -rw-r----- 1 root keystone 2400 Sep 22 2016 keystone-paste.ini -rw-r----- 1 root keystone 1046 Sep 22 2016 logging.conf -rw-r----- 1 keystone keystone 9699 Sep 22 2016 policy.json -rw-r----- 1 keystone keystone 665 Sep 22 2016 sso_callback_template.html
(3)配置 Apache HTTP 服务器
【1】、编辑/etc/httpd/conf/httpd.conf 文件,配置ServerName 选项为控制节点:
[root@controller ~]# vim /etc/httpd/conf/httpd.conf   #在第96行添加如下的内容

 96 ServerName controller
【2】、创建文件 /etc/httpd/conf.d/wsgi-keystone.conf,并进行编辑
[root@controller ~]# vim /etc/httpd/conf.d/wsgi-keystone.conf Listen 5000 Listen 35357 WSGIDaemonProcess keystone-public processes=5 threads=1 user=keystone group=keystone display-name=%{GROUP} WSGIProcessGroup keystone-public WSGIScriptAlias / /usr/bin/keystone-wsgi-public WSGIApplicationGroup %{GLOBAL} WSGIPassAuthorization On ErrorLogFormat "%{cu}t %M" ErrorLog /var/log/httpd/keystone-error.log CustomLog /var/log/httpd/keystone-access.log combined Require all granted WSGIDaemonProcess keystone-admin processes=5 threads=1 user=keystone group=keystone display-name=%{GROUP} WSGIProcessGroup keystone-admin WSGIScriptAlias / /usr/bin/keystone-wsgi-admin WSGIApplicationGroup %{GLOBAL} WSGIPassAuthorization On ErrorLogFormat "%{cu}t %M" ErrorLog /var/log/httpd/keystone-error.log CustomLog /var/log/httpd/keystone-access.log combined Require all granted
(4)完成安装
【1】、启动 Apache HTTP 服务并配置其随系统启动,并查看80端口,5000端口和35357端口是否已经打开
[root@controller ~]# systemctl enable httpd.service
[root@controller ~]# systemctl start httpd.service
[root@controller ~]# netstat -antulpe | grep 80
tcp6 0 0 :::80 :::* LISTEN 0 25943 2827/httpd
[root@controller ~]# netstat -antulpe | grep 5000
tcp6 0 0 :::5000 :::* LISTEN 0 25951 2827/httpd
[root@controller ~]# netstat -antulpe | grep 35357
tcp6 0 0 :::35357 :::* LISTEN 0 25955 2827/httpd
创建服务实体和API端点
(1)先决条件
【1】、配置认证令牌:
[root@controller ~]# export OS_TOKEN=ca34150208112479d7b3
【2】、配置端点URL:
[root@controller ~]# export OS_URL=http://controller:35357/v3
【3】、配置认证 API 版本:
[root@controller ~]# export OS_IDENTITY_API_VERSION=3
(2)创建服务实体和API端点
【1】、在你的Openstack环境中,认证服务管理服务目录。服务使用这个目录来决定您的环境中可用的服务。
创建服务实体和身份认证服务:
[root@controller ~]# openstack service create \ > --name keystone --description "OpenStack Identity" identity +-------------+----------------------------------+ | Field | Value | +-------------+----------------------------------+ | description | OpenStack Identity | | enabled | True | | id | e0109484377e4886b385fdf8e9467f79 | | name | keystone | | type | identity | +-------------+----------------------------------+
【2】、身份认证服务管理了一个与您环境相关的 API 端点的目录。服务使用这个目录来决定如何与您环境中的其他服务进行通信。OpenStack使用三个API端点变种代表每种服务:admin,internal和public。默认情况下,管理API端点允许修改用户和 租户而公共和内部APIs不允许这些操作。在生产环境中,处于安全原因,变种为了服务不同类型的用户可能驻留在单独的网络上。对实例而言,公共API网络 为了让顾客管理他们自己的云在互联网上是可见的。管理API网络在管理云基础设施的组织中操作也是有所限制的。内部API网络可能会被限制在包含 OpenStack服务的主机上。此外,OpenStack支持可伸缩性的多区域。为了简单起见,本指南为所有端点变种和默认RegionOne 区域都使用管理网络。
创建认证服务的 API 端点:
[root@controller ~]# openstack endpoint create --region RegionOne \

>   identity public http://controller:5000/v3

+--------------+----------------------------------+

| Field        | Value                            |

+--------------+----------------------------------+

| enabled      | True                             |

| id           | b622d05e1cf14b9aa46ce0b67fc282d8 |

| interface    | public                           |

| region       | RegionOne                        |

| region_id    | RegionOne                        |

| service_id   | e0109484377e4886b385fdf8e9467f79 |

| service_name | keystone                         |

| service_type | identity                         |

| url          | http://controller:5000/v3        |

+--------------+----------------------------------+


[root@controller ~]# openstack endpoint create --region RegionOne \

>   identity internal http://controller:5000/v3

+--------------+----------------------------------+

| Field        | Value                            |

+--------------+----------------------------------+

| enabled      | True                             |

| id           | fb5705a8143d4cc7a912c18df7f499c6 |

| interface    | internal                         |

| region       | RegionOne                        |

| region_id    | RegionOne                        |

| service_id   | e0109484377e4886b385fdf8e9467f79 |

| service_name | keystone                         |

| service_type | identity                         |

| url          | http://controller:5000/v3        |

+--------------+----------------------------------+


[root@controller ~]# openstack endpoint create --region RegionOne \

>   identity admin http://controller:35357/v3

+--------------+----------------------------------+

| Field        | Value                            |

+--------------+----------------------------------+

| enabled      | True                             |

| id           | 1316fa22cd1b402dbb7795804878007f |

| interface    | admin                            |

| region       | RegionOne                        |

| region_id    | RegionOne                        |

| service_id   | e0109484377e4886b385fdf8e9467f79 |

| service_name | keystone                         |

| service_type | identity                         |

| url          | http://controller:35357/v3       |

+--------------+----------------------------------+
查看服务实体,身份认证服务和API端点是否创建成功
#方法一:非交互模式进行查看(缺点是命令不能补齐) [root@controller ~]# openstack service list +----------------------------------+----------+----------+ | ID | Name | Type | +----------------------------------+----------+----------+ | e0109484377e4886b385fdf8e9467f79 | keystone | identity | +----------------------------------+----------+----------+ [root@controller ~]# openstack endpoint list +----------+----------+--------------+--------------+---------+-----------+-------------+ | ID | Region | Service Name | Service Type | Enabled | Interface | URL | +----------+----------+--------------+--------------+---------+-----------+-------------+ | 1316fa22 | RegionOn | keystone | identity | True | admin | http://cont | | cd1b402d | e | | | | | roller:3535 | | bb779580 | | | | | | 7/v3 | | 4878007f | | | | | | | | b622d05e | RegionOn | keystone | identity | True | public | http://cont | | 1cf14b9a | e | | | | | roller:5000 | | a46ce0b6 | | | | | | /v3 | | 7fc282d8 | | | | | | | | fb5705a8 | RegionOn | keystone | identity | True | internal | http://cont | | 143d4cc7 | e | | | | | roller:5000 | | a912c18d | | | | | | /v3 | | f7f499c6 | | | | | | | +----------+----------+--------------+--------------+---------+-----------+-------------+ #方法二:交互模式进行查看(优点是命令可以补齐) [root@controller ~]# openstack (openstack) service list +----------------------------------+----------+----------+ | ID | Name | Type | +----------------------------------+----------+----------+ | e0109484377e4886b385fdf8e9467f79 | keystone | identity | +----------------------------------+----------+----------+ (openstack) endpoint list +----------+----------+--------------+--------------+---------+-----------+-------------+ | ID | Region | Service Name | Service Type | Enabled | Interface | URL | +----------+----------+--------------+--------------+---------+-----------+-------------+ | 1316fa22 | RegionOn | keystone | identity | True | admin | http://cont | | cd1b402d | e | | | | | roller:3535 | | bb779580 | | | | | | 7/v3 | | 4878007f | | | | | | | | b622d05e | RegionOn | keystone | identity | True | public | http://cont | | 1cf14b9a | e | | | | | roller:5000 | | a46ce0b6 | | | | | | /v3 | | 7fc282d8 | | | | | | | | fb5705a8 | RegionOn | keystone | identity | True | internal | http://cont | | 143d4cc7 | e | | | | | roller:5000 | | a912c18d | | | | | | /v3 | | f7f499c6 | | | | | | | +----------+----------+--------------+--------------+---------+-----------+-------------+
创建域、项目、用户和角色
(1)创建域default:
[root@controller ~]# openstack domain create --description "Default Domain" default +-------------+----------------------------------+ | Field | Value | +-------------+----------------------------------+ | description | Default Domain | | enabled | True | | id | de961da844e84398821316b22d52d7c6 | | name | default | +-------------+----------------------------------+
(2)在你的环境中,为进行管理操作,创建管理的项目、用户和角色:
【1】、创建 admin 项目:
[root@controller ~]# openstack project create --domain default \ > --description "Admin Project" admin +-------------+----------------------------------+ | Field | Value | +-------------+----------------------------------+ | description | Admin Project | | domain_id | de961da844e84398821316b22d52d7c6 | | enabled | True | | id | 0ab00c48d2b94493b654f33f2eb5a579 | | is_domain | False | | name | admin | | parent_id | de961da844e84398821316b22d52d7c6 | +-------------+----------------------------------+
【2】、创建 admin 用户:
[root@controller ~]# openstack user create --domain default \

>   --password admin admin   #指定admin用户的密码为admin。非交互式创建admin用户

+-----------+----------------------------------+

| Field     | Value                            |

+-----------+----------------------------------+

| domain_id | de961da844e84398821316b22d52d7c6 |

| enabled   | True                             |

| id        | 74fbbef71f3a4c958b2006a8e0cdcb8c |

| name      | admin                            |

+-----------+----------------------------------+

#也可以使用下面的命令来交互式创建admin用户

openstack user create --domain default \

  --password-prompt admin
【3】、创建 admin 角色:
[root@controller ~]# openstack role create admin

+-----------+----------------------------------+

| Field     | Value                            |

+-----------+----------------------------------+

| domain_id | None                             |

| id        | 842b43ee3259494ab6f9ab467cd9d8dd |

| name      | admin                            |

+-----------+----------------------------------+
【4】、添加admin 角色到 admin 项目和用户上:
[root@controller ~]# openstack role add --project admin --user admin admin
(3)本指南使用一个你添加到你的环境中每个服务包含独有用户的service 项目。创建service项目:
[root@controller ~]# openstack project create --domain default \

>   --description "Service Project" service

+-------------+----------------------------------+

| Field       | Value                            |

+-------------+----------------------------------+

| description | Service Project                  |

| domain_id   | de961da844e84398821316b22d52d7c6 |

| enabled     | True                             |

| id          | dace50099735499a8cceb4fe8ffad750 |

| is_domain   | False                            |

| name        | service                          |

| parent_id   | de961da844e84398821316b22d52d7c6 |

+-------------+----------------------------------+
(4)常规(非管理)任务应该使用无特权的项目和用户。作为例子,本指南创建 demo 项目和用户。
【1】、创建demo 项目:
[root@controller ~]# openstack project create --domain default \

>   --description "Demo Project" demo

+-------------+----------------------------------+

| Field       | Value                            |

+-------------+----------------------------------+

| description | Demo Project                     |

| domain_id   | de961da844e84398821316b22d52d7c6 |

| enabled     | True                             |

| id          | 4bf385a6bf92458194acf7a2faef794b |

| is_domain   | False                            |

| name        | demo                             |

| parent_id   | de961da844e84398821316b22d52d7c6 |

+-------------+----------------------------------+
【2】、创建demo 用户:
[root@controller ~]# openstack user create --domain default \

>   --password demo demo   #指定demo用户的密码为demo。非交互式创建glance用户

+-----------+----------------------------------+

| Field     | Value                            |

+-----------+----------------------------------+

| domain_id | de961da844e84398821316b22d52d7c6 |

| enabled   | True                             |

| id        | c058d3e4f37940dc94ee618826e4ef6f |

| name      | demo                             |

+-----------+----------------------------------+

#也可以使用下面的命令来交互式创建demo用户

openstack user create --domain default \

  --password-prompt demo
【3】、创建 user 角色:
[root@controller ~]# openstack role create user +-----------+----------------------------------+ | Field | Value | +-----------+----------------------------------+ | domain_id | None | | id | ef665ff3bb02459d91fc7f634cd36ea1 | | name | user | +-----------+----------------------------------+
【4】、添加 user角色到demo 项目和用户:
[root@controller ~]# openstack role add --project demo --user demo user
查看域,项目,用户和角色是否创建成功
[root@controller ~]# openstack (openstack) domain list +----------------------------------+---------+---------+----------------+ | ID | Name | Enabled | Description | +----------------------------------+---------+---------+----------------+ | de961da844e84398821316b22d52d7c6 | default | True | Default Domain | +----------------------------------+---------+---------+----------------+ (openstack) project list +----------------------------------+---------+ | ID | Name | +----------------------------------+---------+ | 0ab00c48d2b94493b654f33f2eb5a579 | admin | | 4bf385a6bf92458194acf7a2faef794b | demo | | dace50099735499a8cceb4fe8ffad750 | service | +----------------------------------+---------+ (openstack) user list +----------------------------------+-------+ | ID | Name | +----------------------------------+-------+ | 74fbbef71f3a4c958b2006a8e0cdcb8c | admin | | c058d3e4f37940dc94ee618826e4ef6f | demo | +----------------------------------+-------+ (openstack) role list +----------------------------------+-------+ | ID | Name | +----------------------------------+-------+ | 842b43ee3259494ab6f9ab467cd9d8dd | admin | | ef665ff3bb02459d91fc7f634cd36ea1 | user | +----------------------------------+-------+
验证操作
(1)重置OS_TOKEN和OS_URL 环境变量:
[root@controller ~]# unset OS_TOKEN OS_URL
(2)作为 admin 用户,请求认证令牌:
[root@controller ~]# unset OS_TOKEN OS_URL

[root@controller ~]# openstack --os-auth-url http://controller:35357/v3 \

>   --os-project-domain-name default --os-user-domain-name default \

>   --os-project-name admin --os-username admin token issue

Password:     #输入密码"admin"

+------------+-----------------------------------------------------------------+

| Field      | Value                                                           |

+------------+-----------------------------------------------------------------+

| expires    | 2019-04-18T13:28:27.564216Z                                     |

| id         | gAAAAABcuG1rVqz6FQcqYJBOBc4rRPb_1R3njUl6RDuQuWYcuUVj7s9m0Xu0SXH |

|            | _Ka3fRG9WpnTTtHyGA9scEYwgCu8sP1RnpadCEy9z7lfmnxyMX80mPucIC6ArFh |

|            | OqnxWyhgRk-UqsoNKDjrrT2_T0xQkLz8kKwTKk1Q5Hp6FltLc-u0oTGZ0       |

| project_id | 0ab00c48d2b94493b654f33f2eb5a579                                |

| user_id    | 74fbbef71f3a4c958b2006a8e0cdcb8c                                |

+------------+----------------------------------------------------------------
(3)作为demo 用户,请求认证令牌:
[root@controller ~]# openstack --os-auth-url http://controller:5000/v3 \

>   --os-project-domain-name default --os-user-domain-name default \

>   --os-project-name demo --os-username demo token issue

Password:

+------------+-----------------------------------------------------------------+

| Field      | Value                                                           |

+------------+-----------------------------------------------------------------+

| expires    | 2019-04-18T13:29:18.418594Z                                     |

| id         | gAAAAABcuG2evXvUcaogMeQ1CRzqa1uELVCSotxIIm520pElps-4NkoYAmUq31l |

|            | dSa1Q5H0T_DYm7PtBooaHMykk80ehnjDFJrMZVF3VKGBK4yQpcT9aXEPnMMV9oP |

|            | camyem-iPe7brpWR8SlHaebbZlf2dd1HVvwVBuFiDQruCmzYsyr0ahJIw       |

| project_id | 4bf385a6bf92458194acf7a2faef794b                                |

| user_id    | c058d3e4f37940dc94ee618826e4ef6f                                |

+------------+-----------------------------------------------------------------+
创建Openstack客户端环境脚本
(1)创建脚本
创建 admin 和 [](http://172.25.83.83/install-guide-rdo/keystone-openrc.html#id1)demo项目和用户创建客户端环境变量脚本。本指南的接下来的部分会引用这些脚本,为客户端操作加载合适的的凭证。
(1)编辑文件 admin-openrc 并添加如下内容:
[root@controller ~]# vim admin-openrc

export OS_PROJECT_DOMAIN_NAME=default

export OS_USER_DOMAIN_NAME=default

export OS_PROJECT_NAME=admin

export OS_USERNAME=admin

export OS_PASSWORD=admin

export OS_AUTH_URL=http://controller:35357/v3

export OS_IDENTITY_API_VERSION=3

export OS_IMAGE_API_VERSION=2
(2)编辑文件 demo-openrc 并添加如下内容:
[root@controller ~]# vim demo-openrc

export OS_PROJECT_DOMAIN_NAME=default

export OS_USER_DOMAIN_NAME=default

export OS_PROJECT_NAME=demo

export OS_USERNAME=demo

export OS_PASSWORD=demo

export OS_AUTH_URL=http://controller:5000/v3

export OS_IDENTITY_API_VERSION=3

export OS_IMAGE_API_VERSION=2
(2)使用脚本
[root@controller ~]# source admin-openrc   #执行admin-openrc脚本,获取admin用户的身份

[root@controller ~]# openstack user list

+----------------------------------+-------+

| ID                               | Name  |

+----------------------------------+-------+

| 74fbbef71f3a4c958b2006a8e0cdcb8c | admin |

| c058d3e4f37940dc94ee618826e4ef6f | demo  |

+----------------------------------+-------+

[root@controller ~]# source demo-openrc   #执行demo-openrc脚本,获取demo用户的身份

[root@controller ~]# openstack user list   #因为普通用户demo没有查看的权限,所以这里会报错

You are not authorized to perform the requested action: identity:list_users (HTTP 403) (Request-ID: req-2afdae43-c77b-4a3f-b14e-6166ab054428)
3、配置镜像服务
安装和配置
(1)先决条件
【1】、完成下面的步骤以创建数据库:
[root@controller ~]# mysql -u root -p   #用数据库连接客户端以 root 用户连接到数据库服务器

Enter password:   #输入密码

MariaDB [(none)]> CREATE DATABASE glance;   #创建 glance 数据库

Query OK, 1 row affected (0.00 sec)


MariaDB [(none)]> GRANT ALL PRIVILEGES ON glance.* TO 'glance'@'localhost' \

    ->   IDENTIFIED BY 'glance';   #对``glance``数据库授予恰当的权限

Query OK, 0 rows affected (0.00 sec)


MariaDB [(none)]> GRANT ALL PRIVILEGES ON glance.* TO 'glance'@'%'    IDENTIFIED BY 'glance';   #对``glance``数据库授予恰当的权限

Query OK, 0 rows affected (0.01 sec)


MariaDB [(none)]> ^DBye   #退出数据库客户端。
【2】、获得 admin 凭证来获取只有管理员能执行的命令的访问权限:
[root@controller ~]# source admin-openrc
【3】、要创建服务证书,完成这些步骤:
-
创建 glance 用户:
[root@controller ~]# openstack user create --domain default --password glance glance   #指定glance用户的密码为glance。非交互式创建glance用户

+-----------+----------------------------------+

| Field     | Value                            |

+-----------+----------------------------------+

| domain_id | de961da844e84398821316b22d52d7c6 |

| enabled   | True                             |

| id        | c7fc73f73e9a49b0ac77d642b32e2997 |

| name      | glance                           |

+-----------+----------------------------------+

#也可以使用下面的命令来交互式创建glance用户

openstack user create --domain default --password-prompt glance
-
添加 admin 角色到 glance 用户和 service 项目上。
[root@controller ~]# openstack role add --project service --user glance admin
-
创建
glance服务实体:
[root@controller ~]# openstack service create --name glance \

>   --description "OpenStack Image" image

+-------------+----------------------------------+

| Field       | Value                            |

+-------------+----------------------------------+

| description | OpenStack Image                  |

| enabled     | True                             |

| id          | 2a6c4ed243d4476ca1085892657ec645 |

| name        | glance                           |

| type        | image                            |

+-------------+----------------------------------+
【4】、创建镜像服务的 API 端点:
[root@controller ~]#  openstack endpoint create --region RegionOne \

>   image public http://controller:9292

+--------------+----------------------------------+

| Field        | Value                            |

+--------------+----------------------------------+

| enabled      | True                             |

| id           | b32f2696e1c34a4395139f373a234792 |

| interface    | public                           |

| region       | RegionOne                        |

| region_id    | RegionOne                        |

| service_id   | 2a6c4ed243d4476ca1085892657ec645 |

| service_name | glance                           |

| service_type | image                            |

| url          | http://controller:9292           |

+--------------+----------------------------------+


[root@controller ~]# openstack endpoint create --region RegionOne \

>   image internal http://controller:9292

+--------------+----------------------------------+

| Field        | Value                            |

+--------------+----------------------------------+

| enabled      | True                             |

| id           | 12401819a8e24539b3e6a878fda0530b |

| interface    | internal                         |

| region       | RegionOne                        |

| region_id    | RegionOne                        |

| service_id   | 2a6c4ed243d4476ca1085892657ec645 |

| service_name | glance                           |

| service_type | image                            |

| url          | http://controller:9292           |

+--------------+----------------------------------+


[root@controller ~]# openstack endpoint create --region RegionOne \

>   image admin http://controller:9292

+--------------+----------------------------------+

| Field        | Value                            |

+--------------+----------------------------------+

| enabled      | True                             |

| id           | 7d0917aea7e3475aad3fa8deaeac28d0 |

| interface    | admin                            |

| region       | RegionOne                        |

| region_id    | RegionOne                        |

| service_id   | 2a6c4ed243d4476ca1085892657ec645 |

| service_name | glance                           |

| service_type | image                            |

| url          | http://controller:9292           |

+--------------+----------------------------------+
查看用户,服务实体,API端点是否创建成功
[root@controller ~]# openstack

(openstack) user list

+----------------------------------+--------+

| ID                               | Name   |

+----------------------------------+--------+

| 74fbbef71f3a4c958b2006a8e0cdcb8c | admin  |

| c058d3e4f37940dc94ee618826e4ef6f | demo   |

| c7fc73f73e9a49b0ac77d642b32e2997 | glance |

+----------------------------------+--------+

(openstack) service list

+----------------------------------+----------+----------+

| ID                               | Name     | Type     |

+----------------------------------+----------+----------+

| 2a6c4ed243d4476ca1085892657ec645 | glance   | image    |

| e0109484377e4886b385fdf8e9467f79 | keystone | identity |

+----------------------------------+----------+----------+

(openstack) endpoint list

+----------+----------+--------------+--------------+---------+-----------+-------------+

| ID       | Region   | Service Name | Service Type | Enabled | Interface | URL         |

+----------+----------+--------------+--------------+---------+-----------+-------------+

| 12401819 | RegionOn | glance       | image        | True    | internal  | http://cont |

| a8e24539 | e        |              |              |         |           | roller:9292 |

| b3e6a878 |          |              |              |         |           |             |

| fda0530b |          |              |              |         |           |             |

| 1316fa22 | RegionOn | keystone     | identity     | True    | admin     | http://cont |

| cd1b402d | e        |              |              |         |           | roller:3535 |

| bb779580 |          |              |              |         |           | 7/v3        |

| 4878007f |          |              |              |         |           |             |

| 7d0917ae | RegionOn | glance       | image        | True    | admin     | http://cont |

| a7e3475a | e        |              |              |         |           | roller:9292 |

| ad3fa8de |          |              |              |         |           |             |

| aeac28d0 |          |              |              |         |           |             |

| b32f2696 | RegionOn | glance       | image        | True    | public    | http://cont |

| e1c34a43 | e        |              |              |         |           | roller:9292 |

| 95139f37 |          |              |              |         |           |             |

| 3a234792 |          |              |              |         |           |             |

| b622d05e | RegionOn | keystone     | identity     | True    | public    | http://cont |

| 1cf14b9a | e        |              |              |         |           | roller:5000 |

| a46ce0b6 |          |              |              |         |           | /v3         |

| 7fc282d8 |          |              |              |         |           |             |

| fb5705a8 | RegionOn | keystone     | identity     | True    | internal  | http://cont |

| 143d4cc7 | e        |              |              |         |           | roller:5000 |

| a912c18d |          |              |              |         |           | /v3         |

| f7f499c6 |          |              |              |         |           |             |

+----------+----------+--------------+--------------+---------+-----------+-----
(2)安全并配置组件
【1】、安装软件包:
[root@controller ~]# yum install openstack-glance -y
【2】、编辑文件 /etc/glance/glance-api.conf 并完成如下动作:
[root@controller ~]# vim /etc/glance/glance-api.conf

在 [database] 部分,配置数据库访问:

[database]

connection = mysql+pymysql://glance:glance@controller/glance


在 [keystone_authtoken] 和 [paste_deploy] 部分,配置认证服务访问:

[keystone_authtoken]

auth_uri = http://controller:5000

auth_url = http://controller:35357

memcached_servers = controller:11211

auth_type = password

project_domain_name = default

user_domain_name = default

project_name = service

username = glance

password = glance


[paste_deploy]

flavor = keystone


在 [glance_store] 部分,配置本地文件系统存储和镜像文件位置:

[glance_store]

stores = file,http

default_store = file

filesystem_store_datadir = /var/lib/glance/images/
【3】、编辑文件 [](http://172.25.83.83/install-guide-rdo/glance-install.html#id1)/etc/glance/glance-registry.conf并完成如下动作:
[root@controller ~]# vim /etc/glance/glance-registry.conf

在 [database] 部分,配置数据库访问:

[database]

connection = mysql+pymysql://glance:glance@controller/glance


在 [keystone_authtoken] 和 [paste_deploy] 部分,配置认证服务访问:

[keystone_authtoken]

auth_uri = http://controller:5000

auth_url = http://controller:35357

memcached_servers = controller:11211

auth_type = password

project_domain_name = default

user_domain_name = default

project_name = service

username = glance

password = glance


[paste_deploy]

flavor = keystone
【4】、写入镜像服务数据库,并登陆数据库查看是否写入成功
[root@controller ~]# su -s /bin/sh -c "glance-manage db_sync" glance

Option "verbose" from group "DEFAULT" is deprecated for removal.  Its value may be silently ignored in the future.

/usr/lib/python2.7/site-packages/oslo_db/sqlalchemy/enginefacade.py:1056: OsloDBDeprecationWarning: EngineFacade is deprecated; please use oslo_db.sqlalchemy.enginefacade

  expire_on_commit=expire_on_commit, _conf=conf)

/usr/lib/python2.7/site-packages/pymysql/cursors.py:166: Warning: (1831, u'Duplicate index `ix_image_properties_image_id_name`. This is deprecated and will be disallowed in a future release.')

  result = self._query(query)


#忽略输出中任何不推荐使用的信息。


[root@controller ~]# mysql -uroot -p

Enter password:   #输入密码

MariaDB [(none)]> use glance;

MariaDB [glance]> show tables;

+----------------------------------+

| Tables_in_glance                 |

+----------------------------------+

| artifact_blob_locations          |

| artifact_blobs                   |

| artifact_dependencies            |

| artifact_properties              |

| artifact_tags                    |

| artifacts                        |

| image_locations                  |

| image_members                    |

| image_properties                 |

| image_tags                       |

| images                           |

| metadef_namespace_resource_types |

| metadef_namespaces               |

| metadef_objects                  |

| metadef_properties               |

| metadef_resource_types           |

| metadef_tags                     |

| migrate_version                  |

| task_info                        |

| tasks                            |

+----------------------------------+

20 rows in set (0.00 sec)


MariaDB [glance]> ^DBye   #按"Ctrl+d"退出数据库客户端
(3)完成安装
【1】、启动镜像服务、配置他们随机启动:
[root@controller ~]# systemctl enable openstack-glance-api.service \

>   openstack-glance-registry.service

[root@controller ~]# systemctl start openstack-glance-api.service \

>   openstack-glance-registry.service
验证操作
(1)下载源镜像:
[root@controller ~]# ls

admin-openrc  cirros-0.3.5-x86_64-disk.img  demo-openrc
(2)使用 磁盘格式, 容器格式上传镜像到镜像服务并设置公共可见,这样所有的项目都可以访问它:
[root@controller ~]# openstack image create "cirros" --file cirros-0.3.5-x86_64-disk.img --disk-format qcow2 --container-format bare --public +------------------+------------------------------------------------------+ | Field | Value | +------------------+------------------------------------------------------+ | checksum | f8ab98ff5e73ebab884d80c9dc9c7290 | | container_format | bare | | created_at | 2019-04-18T13:13:55Z | | disk_format | qcow2 | | file | /v2/images/fe68d600-2b20-45de-8391-2d3eecdaca4e/file | | id | fe68d600-2b20-45de-8391-2d3eecdaca4e | | min_disk | 0 | | min_ram | 0 | | name | cirros | | owner | 0ab00c48d2b94493b654f33f2eb5a579 | | protected | False | | schema | /v2/schemas/image | | size | 13267968 | | status | active | | tags | | | updated_at | 2019-04-18T13:13:55Z | | virtual_size | None | | visibility | public | +------------------+------------------------------------------------------+
(3)确认镜像的上传并验证属性:
[root@controller ~]# openstack image list #状态是active表示成功 +--------------------------------------+--------+--------+ | ID | Name | Status | +--------------------------------------+--------+--------+ | fe68d600-2b20-45de-8391-2d3eecdaca4e | cirros | active | +--------------------------------------+--------+--------+
4、计算服务
(1)先决条件
【1】、为了创建数据库,必须完成这些步骤:
[root@controller ~]# mysql -uroot -p #用数据库连接客户端以 root 用户连接到数据库服务器 Enter password: #输入密码 MariaDB [(none)]> CREATE DATABASE nova_api; #创建 nova_api 数据库 Query OK, 1 row affected (0.00 sec) MariaDB [(none)]> CREATE DATABASE nova; #创建 nova 数据库: Query OK, 1 row affected (0.00 sec) MariaDB [(none)]> GRANT ALL PRIVILEGES ON nova_api.* TO 'nova'@'localhost' \ -> IDENTIFIED BY 'nova'; #对数据库进行正确的授权: Query OK, 0 rows affected (0.00 sec) MariaDB [(none)]> GRANT ALL PRIVILEGES ON nova_api.* TO 'nova'@'%' IDENTIFIED BY 'nova'; #对数据库进行正确的授权: Query OK, 0 rows affected (0.00 sec) MariaDB [(none)]> GRANT ALL PRIVILEGES ON nova.* TO 'nova'@'localhost' \ -> IDENTIFIED BY 'nova'; #对数据库进行正确的授权: Query OK, 0 rows affected (0.00 sec) MariaDB [(none)]> GRANT ALL PRIVILEGES ON nova.* TO 'nova'@'%' IDENTIFIED BY 'nova'; #对数据库进行正确的授权: Query OK, 0 rows affected (0.00 sec) MariaDB [(none)]> ^DBye #退出数据库客户端。
【2】、获得 admin 凭证来获取只有管理员能执行的命令的访问权限:
[root@controller ~]# source admin-openrc
【3】、要创建服务证书,完成这些步骤:
-
创建 nova 用户:
[root@controller ~]# openstack user create --domain default \ #指定nova用户的密码为nova。非交互式创建nova用户 > --password nova nova +-----------+----------------------------------+ | Field | Value | +-----------+----------------------------------+ | domain_id | de961da844e84398821316b22d52d7c6 | | enabled | True | | id | 21cc7d5766c241bf8de6e2dd2c1fa4e1 | | name | nova | +-----------+----------------------------------+ #也可以使用下面的命令来交互式创建glance用户 openstack user create --domain default \ --password-prompt nova
-
给 nova 用户添加 admin 角色:
[root@controller ~]# openstack role add --project service --user nova admin
-
创建 nova 服务实体:
[root@controller ~]# openstack service create --name nova \

>   --description "OpenStack Compute" compute

+-------------+----------------------------------+

| Field       | Value                            |

+-------------+----------------------------------+

| description | OpenStack Compute                |

| enabled     | True                             |

| id          | 9011c0f89bed4f8184661b22dfe60729 |

| name        | nova                             |

| type        | compute                          |

+-------------+----------------------------------+
【4】、创建 Compute 服务 API 端点 :
[root@controller ~]# openstack endpoint create --region RegionOne \ > compute public http://controller:8774/v2.1/%\(tenant_id\)s +--------------+-------------------------------------------+ | Field | Value | +--------------+-------------------------------------------+ | enabled | True | | id | 50063bd98af24f1c82bdfb75d78c0dde | | interface | public | | region | RegionOne | | region_id | RegionOne | | service_id | 9011c0f89bed4f8184661b22dfe60729 | | service_name | nova | | service_type | compute | | url | http://controller:8774/v2.1/%(tenant_id)s | +--------------+-------------------------------------------+ [root@controller ~]# openstack endpoint create --region RegionOne \ > compute internal http://controller:8774/v2.1/%\(tenant_id\)s +--------------+-------------------------------------------+ | Field | Value | +--------------+-------------------------------------------+ | enabled | True | | id | bced68ae5cc141c69ed0e18de09fc708 | | interface | internal | | region | RegionOne | | region_id | RegionOne | | service_id | 9011c0f89bed4f8184661b22dfe60729 | | service_name | nova | | service_type | compute | | url | http://controller:8774/v2.1/%(tenant_id)s | +--------------+-------------------------------------------+ [root@controller ~]# openstack endpoint create --region RegionOne \ > compute admin http://controller:8774/v2.1/%\(tenant_id\)s +--------------+-------------------------------------------+ | Field | Value | +--------------+-------------------------------------------+ | enabled | True | | id | 2a3bcdde1ea040219e667a6b0ffd7d54 | | interface | admin | | region | RegionOne | | region_id | RegionOne | | service_id | 9011c0f89bed4f8184661b22dfe60729 | | service_name | nova | | service_type | compute | | url | http://controller:8774/v2.1/%(tenant_id)s | +--------------+-------------------------------------------+
查看用户,服务实体,API端点是否创建成功
[root@controller ~]# openstack (openstack) user list +----------------------------------+--------+ | ID | Name | +----------------------------------+--------+ | 21cc7d5766c241bf8de6e2dd2c1fa4e1 | nova | | 74fbbef71f3a4c958b2006a8e0cdcb8c | admin | | c058d3e4f37940dc94ee618826e4ef6f | demo | | c7fc73f73e9a49b0ac77d642b32e2997 | glance | +----------------------------------+--------+ (openstack) service list +----------------------------------+----------+----------+ | ID | Name | Type | +----------------------------------+----------+----------+ | 2a6c4ed243d4476ca1085892657ec645 | glance | image | | 9011c0f89bed4f8184661b22dfe60729 | nova | compute | | e0109484377e4886b385fdf8e9467f79 | keystone | identity | +----------------------------------+----------+----------+ (openstack) endpoint list +----------+----------+--------------+--------------+---------+-----------+-------------+ | ID | Region | Service Name | Service Type | Enabled | Interface | URL | +----------+----------+--------------+--------------+---------+-----------+-------------+ | 12401819 | RegionOn | glance | image | True | internal | http://cont | | a8e24539 | e | | | | | roller:9292 | | b3e6a878 | | | | | | | | fda0530b | | | | | | | | 1316fa22 | RegionOn | keystone | identity | True | admin | http://cont | | cd1b402d | e | | | | | roller:3535 | | bb779580 | | | | | | 7/v3 | | 4878007f | | | | | | | | 2a3bcdde | RegionOn | nova | compute | True | admin | http://cont | | 1ea04021 | e | | | | | roller:8774 | | 9e667a6b | | | | | | /v2.1/%(ten | | 0ffd7d54 | | | | | | ant_id)s | | 50063bd9 | RegionOn | nova | compute | True | public | http://cont | | 8af24f1c | e | | | | | roller:8774 | | 82bdfb75 | | | | | | /v2.1/%(ten | | d78c0dde | | | | | | ant_id)s | | 7d0917ae | RegionOn | glance | image | True | admin | http://cont | | a7e3475a | e | | | | | roller:9292 | | ad3fa8de | | | | | | | | aeac28d0 | | | | | | | | b32f2696 | RegionOn | glance | image | True | public | http://cont | | e1c34a43 | e | | | | | roller:9292 | | 95139f37 | | | | | | | | 3a234792 | | | | | | | | b622d05e | RegionOn | keystone | identity | True | public | http://cont | | 1cf14b9a | e | | | | | roller:5000 | | a46ce0b6 | | | | | | /v3 | | 7fc282d8 | | | | | | | | bced68ae | RegionOn | nova | compute | True | internal | http://cont | | 5cc141c6 | e | | | | | roller:8774 | | 9ed0e18d | | | | | | /v2.1/%(ten | | e09fc708 | | | | | | ant_id)s | | fb5705a8 | RegionOn | keystone | identity | True | internal | http://cont | | 143d4cc7 | e | | | | | roller:5000 | | a912c18d | | | | | | /v3 | | f7f499c6 | | | | | | | +----------+----------+--------------+--------------+---------+-----------+-------------+
(2)安全并配置组件
【1】、安装软件包:
[root@controller ~]# yum install openstack-nova-api openstack-nova-conductor openstack-nova-console openstack-nova-novncproxy openstack-nova-scheduler -y
【2】、编辑/etc/nova/nova.conf文件并完成下面的操作:
[root@controller ~]# vim /etc/nova/nova.conf 在``[DEFAULT]``部分,只启用计算和元数据API: [DEFAULT] enabled_apis = osapi_compute,metadata 在``[api_database]``和``[database]``部分,配置数据库的连接: [api_database] connection = mysql+pymysql://nova:nova@controller/nova_api [database] connection = mysql+pymysql://nova:nova@controller/nova 在 “[DEFAULT]” 和 “[oslo_messaging_rabbit]”部分,配置 “RabbitMQ” 消息队列访问: [DEFAULT] ... rpc_backend = rabbit [oslo_messaging_rabbit] rabbit_host = controller rabbit_userid = openstack rabbit_password = openstack 在 “[DEFAULT]” 和 “[keystone_authtoken]” 部分,配置认证服务访问: [DEFAULT] ... auth_strategy = keystone [keystone_authtoken] auth_uri = http://controller:5000 auth_url = http://controller:35357 memcached_servers = controller:11211 auth_type = password project_domain_name = default user_domain_name = default project_name = service username = nova password = nova 在 [DEFAULT 部分,配置``my_ip`` 来使用控制节点的管理接口的IP 地址。 [DEFAULT] ... my_ip = 172.25.83.1 在 [DEFAULT] 部分,使能 Networking 服务: [DEFAULT] ... firewall_driver = nova.virt.firewall.NoopFirewallDriver 在``[vnc]``部分,配置VNC代理使用控制节点的管理接口IP地址 : [vnc] vncserver_listen = $my_ip vncserver_proxyclient_address = $my_ip 在 [glance] 区域,配置镜像服务 API 的位置: [glance] api_servers = http://controller:9292 在 [oslo_concurrency] 部分,配置锁路径: [oslo_concurrency] lock_path = /var/lib/nova/tmp
【3】、同步Compute 数据库,并登陆数据库查看是否同步成功
[root@controller ~]# su -s /bin/sh -c "nova-manage api_db sync" nova [root@controller ~]# su -s /bin/sh -c "nova-manage db sync" nova /usr/lib/python2.7/site-packages/pymysql/cursors.py:166: Warning: (1831, u'Duplicate index `block_device_mapping_instance_uuid_virtual_name_device_name_idx`. This is deprecated and will be disallowed in a future release.') result = self._query(query) /usr/lib/python2.7/site-packages/pymysql/cursors.py:166: Warning: (1831, u'Duplicate index `uniq_instances0uuid`. This is deprecated and will be disallowed in a future release.') result = self._query(query) [root@controller ~]# mysql -uroot -p Enter password: MariaDB [(none)]> use nova; MariaDB [nova]> show tables; +--------------------------------------------+ | Tables_in_nova | +--------------------------------------------+ | agent_builds | | aggregate_hosts | | aggregate_metadata | | aggregates | | allocations | | block_device_mapping | | bw_usage_cache | | cells | | certificates | | compute_nodes | | console_pools | | consoles | | dns_domains | | fixed_ips | | floating_ips | | instance_actions | | instance_actions_events | | instance_extra | | instance_faults | | instance_group_member | | instance_group_policy | | instance_groups | | instance_id_mappings | | instance_info_caches | | instance_metadata | | instance_system_metadata | | instance_type_extra_specs | | instance_type_projects | | instance_types | | instances | | inventories | | key_pairs | | migrate_version | | migrations | | networks | | pci_devices | | project_user_quotas | | provider_fw_rules | | quota_classes | | quota_usages | | quotas | | reservations | | resource_provider_aggregates | | resource_providers | | s3_images | | security_group_default_rules | | security_group_instance_association | | security_group_rules | | security_groups | | services | | shadow_agent_builds | | shadow_aggregate_hosts | | shadow_aggregate_metadata | | shadow_aggregates | | shadow_block_device_mapping | | shadow_bw_usage_cache | | shadow_cells | | shadow_certificates | | shadow_compute_nodes | | shadow_console_pools | | shadow_consoles | | shadow_dns_domains | | shadow_fixed_ips | | shadow_floating_ips | | shadow_instance_actions | | shadow_instance_actions_events | | shadow_instance_extra | | shadow_instance_faults | | shadow_instance_group_member | | shadow_instance_group_policy | | shadow_instance_groups | | shadow_instance_id_mappings | | shadow_instance_info_caches | | shadow_instance_metadata | | shadow_instance_system_metadata | | shadow_instance_type_extra_specs | | shadow_instance_type_projects | | shadow_instance_types | | shadow_instances | | shadow_key_pairs | | shadow_migrate_version | | shadow_migrations | | shadow_networks | | shadow_pci_devices | | shadow_project_user_quotas | | shadow_provider_fw_rules | | shadow_quota_classes | | shadow_quota_usages | | shadow_quotas | | shadow_reservations | | shadow_s3_images | | shadow_security_group_default_rules | | shadow_security_group_instance_association | | shadow_security_group_rules | | shadow_security_groups | | shadow_services | | shadow_snapshot_id_mappings | | shadow_snapshots | | shadow_task_log | | shadow_virtual_interfaces | | shadow_volume_id_mappings | | shadow_volume_usage_cache | | snapshot_id_mappings | | snapshots | | tags | | task_log | | virtual_interfaces | | volume_id_mappings | | volume_usage_cache | +--------------------------------------------+ 109 rows in set (0.00 sec) MariaDB [nova]> ^DBye #按"Ctrl+d退出数据库客户端"
[root@controller ~]# mysql -unova -pnova nova MariaDB [nova]> ^DBye [root@controller ~]# mysql -unova -pnova nova_api MariaDB [nova_api]> ^DBye
(3)完成安装
[root@controller ~]# systemctl enable openstack-nova-api.service \ > openstack-nova-consoleauth.service openstack-nova-scheduler.service \ > openstack-nova-conductor.service openstack-nova-novncproxy.service [root@controller ~]# systemctl start openstack-nova-api.service \ > openstack-nova-consoleauth.service openstack-nova-scheduler.service \ > openstack-nova-conductor.service openstack-nova-novncproxy.service
查看关于compute服务的相关服务,是否已经开启
[root@controller ~]# openstack (openstack) compute service list +----+--------------+------------+----------+---------+-------+--------------+ | Id | Binary | Host | Zone | Status | State | Updated At | +----+--------------+------------+----------+---------+-------+--------------+ | 1 | nova- | controller | internal | enabled | up | 2019-04-19T0 | | | conductor | | | | | 2:34:49.0000 | | | | | | | | 00 | | 2 | nova- | controller | internal | enabled | up | 2019-04-19T0 | | | consoleauth | | | | | 2:34:49.0000 | | | | | | | | 00 | | 3 | nova- | controller | internal | enabled | up | 2019-04-19T0 | | | scheduler | | | | | 2:34:49.0000 | | | | | | | | 00 | +----+--------------+------------+----------+---------+-------+--------------+
配置计算节点:
1、环境
主机网络
(1)配置网络接口
【1】、添加一块网卡:
[root@server2 ~]# ip a 1: lo:mtu 65536 qdisc noqueue state UNKNOWN qlen 1 link/loopback 00:00:00:00:00:00 brd 00:00:00:00:00:00 inet 127.0.0.1/8 scope host lo valid_lft forever preferred_lft forever inet6 ::1/128 scope host valid_lft forever preferred_lft forever 2: eth0: mtu 1500 qdisc pfifo_fast state UP qlen 1000 link/ether 52:54:00:74:37:cd brd ff:ff:ff:ff:ff:ff inet 172.25.83.2/24 brd 172.25.83.255 scope global eth0 valid_lft forever preferred_lft forever inet6 fe80::5054:ff:fe74:37cd/64 scope link valid_lft forever preferred_lft forever 3: eth1: mtu 1500 qdisc noop state DOWN qlen 1000 link/ether 52:54:00:bf:b4:09 brd ff:ff:ff:ff:ff:ff
【2】、将第一个接口配置为管理网络接口:
[root@server2 ~]# cd /etc/sysconfig/network-scripts/

[root@server2 network-scripts]# vim ifcfg-eth0

BOOTPROTO=none

NAME=eth0

DEVICE=eth0

ONBOOT=yes

IPADDR=172.25.83.2

NETMASK=255.255.255.0

GATEWAY=172.25.83.83

DNS1=114.114.114.114
【3】、提供者网络接口使用一个特殊的配置,不分配给它IP地址。并进行激活
[root@server2 network-scripts]# cp ifcfg-eth0 ifcfg-eth1 [root@server2 network-scripts]# vim ifcfg-eth1 1 BOOTPROTO=none 2 DEVICE=eth1 3 ONBOOT=yes [root@server2 network-scripts]# ifup eth1 #激活eth1网卡 [root@server2 network-scripts]# ip addr show eth1 3: eth1:mtu 1500 qdisc pfifo_fast state UP qlen 1000 link/ether 52:54:00:bf:b4:09 brd ff:ff:ff:ff:ff:ff inet6 fe80::5054:ff:febf:b409/64 scope link valid_lft forever preferred_lft forever
(2)配置域名解析
【1】、设置节点主机名为compute1。
[root@server2 ~]# hostnamectl set-hostname compute1 [root@server2 ~]# logout Connection to 172.25.83.2 closed. [student@foundation83 ~]$ ssh root@172.25.83.2 root@172.25.83.2's password: Last login: Fri Apr 19 10:30:55 2019 from foundation83.ilt.example.com [root@compute1 ~]# hostname compute1
【2】、编辑 /etc/hosts 文件包含以下内容:
[root@compute1 ~]# vim /etc/hosts 172.25.83.1 controller 172.25.83.2 compute1 172.25.83.3 block1
网络时间协议(NTP)
(1)安全并配置组件
【1】、安装软件包:
[root@compute1 ~]# yum install chrony -y
【2】、编辑/etc/chrony.conf 文件:
[root@compute1 ~]# vim /etc/chrony.conf #删除第4行,第5行,第6行;并将第3行改为如下的内容 3 server 172.25.83.83 iburst
【3】、启动chronyd服务并将其配置为随系统启动:
[root@compute1 ~]# systemctl restart chronyd.service [root@compute1 ~]# chronyc sources -v 210 Number of sources = 1 .-- Source mode '^' = server, '=' = peer, '#' = local clock. / .- Source state '*' = current synced, '+' = combined , '-' = not combined, | / '?' = unreachable, 'x' = time may be in error, '~' = time too variable. || .- xxxx [ yyyy ] +/- zzzz || Reachability register (octal) -. | xxxx = adjusted offset, || Log2(Polling interval) --. | | yyyy = measured offset, || \ | | zzzz = estimated error. || | | \ MS Name/IP address Stratum Poll Reach LastRx Last sample =============================================================================== ^* foundation83.ilt.example. 3 6 17 3 +665ns[+1610us] +/- 79ms [root@compute1 ~]# systemctl enable chronyd.service [root@compute1 ~]# systemctl is-enabled chronyd.service enabled
2、计算服务
在进行配置之前,先配置yum源
[root@compute1 ~]# scp 172.25.83.1:/etc/yum.repos.d/openstack.repo /etc/yum.repos.d/ root@172.25.83.1's password: openstack.repo 100% 70 0.1KB/s 00:00 [root@compute1 ~]# ll -d /etc/yum.repos.d/ drwxr-xr-x. 2 root root 63 Apr 19 11:13 /etc/yum.repos.d/ [root@compute1 ~]# yum clean all [root@compute1 ~]# yum repolist repo id repo name status dvd rhel7.3 4,751 openstack mitaka 279 repolist: 5,030
(1)安全并配置组件
【1】、安装软件包:
[root@compute1 ~]# yum upgrade -y #升级软件包 [root@compute1 ~]# yum install openstack-nova-compute -y
【2】、编辑/etc/nova/nova.conf文件并完成下面的操作:
[root@compute1 ~]# vim /etc/nova/nova.conf 在``[DEFAULT]`` 和 [oslo_messaging_rabbit]部分,配置``RabbitMQ``消息队列的连接: [DEFAULT] rpc_backend = rabbit [oslo_messaging_rabbit] rabbit_host = controller rabbit_userid = openstack rabbit_password = openstack 在 “[DEFAULT]” 和 “[keystone_authtoken]” 部分,配置认证服务访问: [DEFAULT] ... auth_strategy = keystone [keystone_authtoken] auth_uri = http://controller:5000 auth_url = http://controller:35357 memcached_servers = controller:11211 auth_type = password project_domain_name = default user_domain_name = default project_name = service username = nova password = nova 在 [DEFAULT] 部分,配置 my_ip 选项: [DEFAULT] ... my_ip = 172.25.83.2 在 [DEFAULT] 部分,使能 Networking 服务: [DEFAULT] ... use_neutron = True firewall_driver = nova.virt.firewall.NoopFirewallDriver 在``[vnc]``部分,启用并配置远程控制台访问: [vnc] enabled = True vncserver_listen = 0.0.0.0 vncserver_proxyclient_address = $my_ip novncproxy_base_url = http://controller:6080/vnc_auto.html 在 [glance] 区域,配置镜像服务 API 的位置: [glance] api_servers = http://controller:9292 在 [oslo_concurrency] 部分,配置锁路径: [oslo_concurrency] lock_path = /var/lib/nova/tmp
(2)完成安装
【1】、确定您的计算节点是否支持虚拟机的硬件加速。
[root@compute1 ~]# egrep -c '(vmx|svm)' /proc/cpuinfo

0
如果这个命令返回了 one or greater 的值,那么你的计算节点支持硬件加速且不需要额外的配置。
如果这个命令返回了 zero 值,那么你的计算节点不支持硬件加速。你必须配置 libvirt 来使用 QEMU 去代替 KVM
-
在 /etc/nova/nova.conf 文件的 [libvirt] 区域做出如下的编辑:
[libvirt]

virt_type = qemu
【2】、启动计算服务及其依赖,并将其配置为随系统自动启动:
[root@compute1 ~]# systemctl enable libvirtd.service openstack-nova-compute.service

[root@compute1 ~]# systemctl start libvirtd.service openstack-nova-compute.service
在控制节点:茶卡关于compute服务的相关服务,是否已经开启(多开启了一个nova-compute服务)
[root@controller ~]# openstack

(openstack) compute service list

+----+--------------+------------+----------+---------+-------+--------------+

| Id | Binary       | Host       | Zone     | Status  | State | Updated At   |

+----+--------------+------------+----------+---------+-------+--------------+

|  1 | nova-        | controller | internal | enabled | up    | 2019-04-19T0 |

|    | conductor    |            |          |         |       | 3:28:20.0000 |

|    |              |            |          |         |       | 00           |

|  2 | nova-        | controller | internal | enabled | up    | 2019-04-19T0 |

|    | consoleauth  |            |          |         |       | 3:28:20.0000 |

|    |              |            |          |         |       | 00           |

|  3 | nova-        | controller | internal | enabled | up    | 2019-04-19T0 |

|    | scheduler    |            |          |         |       | 3:28:20.0000 |

|    |              |            |          |         |       | 00           |

|  6 | nova-compute | compute1   | nova     | enabled | up    | 2019-04-19T0 |

|    |              |            |          |         |       | 3:28:21.0000 |

|    |              |            |          |         |       | 00           |

+----+--------------+------------+----------+---------+-------+--------------+
接着继续配置控制节点:
5、Networking服务
(1)先决条件
【1】、完成下面的步骤以创建数据库:
[root@controller ~]# mysql -u root -p   #用数据库连接客户端以 root 用户连接到数据库服务器

Enter password:   #输入密码

MariaDB [(none)]> CREATE DATABASE neutron;   #创建``neutron`` 数据库

Query OK, 1 row affected (0.00 sec)


MariaDB [(none)]> GRANT ALL PRIVILEGES ON neutron.* TO 'neutron'@'localhost' \

    ->   IDENTIFIED BY 'neutron';   #对``neutron`` 数据库授予合适的访问权限

Query OK, 0 rows affected (0.00 sec)


MariaDB [(none)]> GRANT ALL PRIVILEGES ON neutron.* TO 'neutron'@'%'    IDENTIFIED BY 'neutron';   #对``neutron`` 数据库授予合适的访问权限

Query OK, 0 rows affected (0.00 sec)


MariaDB [(none)]> ^DBye   #按"Ctrl+d"退出数据库客户端。
【2】、获得 admin 凭证来获取只有管理员能执行的命令的访问权限:
[root@controller ~]# source admin-openrc
【3】、要创建服务证书,完成这些步骤:
-
创建
neutron用户:
[root@controller ~]# openstack user create --domain default --password neutron neutron   #指定neutron用户的密码为neutron。非交互式创建neutron用户

+-----------+----------------------------------+

| Field     | Value                            |

+-----------+----------------------------------+

| domain_id | de961da844e84398821316b22d52d7c6 |

| enabled   | True                             |

| id        | a688eb041a064399a7c4fe238841ea07 |

| name      | neutron                          |

+-----------+----------------------------------+

#也可以使用下面的命令来交互式创建neutron用户

openstack user create --domain default --password-prompt neutron
-
添加
admin角色到neutron用户:
[root@controller ~]# openstack role add --project service --user neutron admin
-
创建
neutron服务实体:
[root@controller ~]# openstack service create --name neutron \ > --description "OpenStack Networking" network +-------------+----------------------------------+ | Field | Value | +-------------+----------------------------------+ | description | OpenStack Networking | | enabled | True | | id | 79b2641148f347228ba96c3900c292c6 | | name | neutron | | type | network | +-------------+----------------------------------+
【4】、创建网络服务API端点:
[root@controller ~]# openstack endpoint create --region RegionOne \ > network public http://controller:9696 +--------------+----------------------------------+ | Field | Value | +--------------+----------------------------------+ | enabled | True | | id | 44f0e573c738438fbf97fe97a50163b7 | | interface | public | | region | RegionOne | | region_id | RegionOne | | service_id | 79b2641148f347228ba96c3900c292c6 | | service_name | neutron | | service_type | network | | url | http://controller:9696 | +--------------+----------------------------------+ [root@controller ~]# openstack endpoint create --region RegionOne \ > network internal http://controller:9696 +--------------+----------------------------------+ | Field | Value | +--------------+----------------------------------+ | enabled | True | | id | 9850f10060584221ab91381e4224b3d7 | | interface | internal | | region | RegionOne | | region_id | RegionOne | | service_id | 79b2641148f347228ba96c3900c292c6 | | service_name | neutron | | service_type | network | | url | http://controller:9696 | +--------------+----------------------------------+ [root@controller ~]# openstack endpoint create --region RegionOne \ > network admin http://controller:9696 +--------------+----------------------------------+ | Field | Value | +--------------+----------------------------------+ | enabled | True | | id | fab7e826606945f085e11765ecf7b75f | | interface | admin | | region | RegionOne | | region_id | RegionOne | | service_id | 79b2641148f347228ba96c3900c292c6 | | service_name | neutron | | service_type | network | | url | http://controller:9696 | +--------------+----------------------------------+
查看用户,服务实体,API端点是否创建成功
[root@controller ~]# openstack (openstack) user list +----------------------------------+---------+ | ID | Name | +----------------------------------+---------+ | 21cc7d5766c241bf8de6e2dd2c1fa4e1 | nova | | 74fbbef71f3a4c958b2006a8e0cdcb8c | admin | | a688eb041a064399a7c4fe238841ea07 | neutron | | c058d3e4f37940dc94ee618826e4ef6f | demo | | c7fc73f73e9a49b0ac77d642b32e2997 | glance | +----------------------------------+---------+ (openstack) service list +----------------------------------+----------+----------+ | ID | Name | Type | +----------------------------------+----------+----------+ | 2a6c4ed243d4476ca1085892657ec645 | glance | image | | 79b2641148f347228ba96c3900c292c6 | neutron | network | | 9011c0f89bed4f8184661b22dfe60729 | nova | compute | | e0109484377e4886b385fdf8e9467f79 | keystone | identity | +----------------------------------+----------+----------+ (openstack) endpoint list +----------+----------+--------------+--------------+---------+-----------+-------------+ | ID | Region | Service Name | Service Type | Enabled | Interface | URL | +----------+----------+--------------+--------------+---------+-----------+-------------+ | 12401819 | RegionOn | glance | image | True | internal | http://cont | | a8e24539 | e | | | | | roller:9292 | | b3e6a878 | | | | | | | | fda0530b | | | | | | | | 1316fa22 | RegionOn | keystone | identity | True | admin | http://cont | | cd1b402d | e | | | | | roller:3535 | | bb779580 | | | | | | 7/v3 | | 4878007f | | | | | | | | 2a3bcdde | RegionOn | nova | compute | True | admin | http://cont | | 1ea04021 | e | | | | | roller:8774 | | 9e667a6b | | | | | | /v2.1/%(ten | | 0ffd7d54 | | | | | | ant_id)s | | 44f0e573 | RegionOn | neutron | network | True | public | http://cont | | c738438f | e | | | | | roller:9696 | | bf97fe97 | | | | | | | | a50163b7 | | | | | | | | 50063bd9 | RegionOn | nova | compute | True | public | http://cont | | 8af24f1c | e | | | | | roller:8774 | | 82bdfb75 | | | | | | /v2.1/%(ten | | d78c0dde | | | | | | ant_id)s | | 7d0917ae | RegionOn | glance | image | True | admin | http://cont | | a7e3475a | e | | | | | roller:9292 | | ad3fa8de | | | | | | | | aeac28d0 | | | | | | | | 9850f100 | RegionOn | neutron | network | True | internal | http://cont | | 60584221 | e | | | | | roller:9696 | | ab91381e | | | | | | | | 4224b3d7 | | | | | | | | b32f2696 | RegionOn | glance | image | True | public | http://cont | | e1c34a43 | e | | | | | roller:9292 | | 95139f37 | | | | | | | | 3a234792 | | | | | | | | b622d05e | RegionOn | keystone | identity | True | public | http://cont | | 1cf14b9a | e | | | | | roller:5000 | | a46ce0b6 | | | | | | /v3 | | 7fc282d8 | | | | | | | | bced68ae | RegionOn | nova | compute | True | internal | http://cont | | 5cc141c6 | e | | | | | roller:8774 | | 9ed0e18d | | | | | | /v2.1/%(ten | | e09fc708 | | | | | | ant_id)s | | fab7e826 | RegionOn | neutron | network | True | admin | http://cont | | 606945f0 | e | | | | | roller:9696 | | 85e11765 | | | | | | | | ecf7b75f | | | | | | | | fb5705a8 | RegionOn | keystone | identity | True | internal | http://cont | | 143d4cc7 | e | | | | | roller:5000 | | a912c18d | | | | | | /v3 | | f7f499c6 | | | | | | | +----------+----------+--------------+--------------+---------+-----------+-------------+
(2)配置网络选项1:公共网络
【1】、安装组件
[root@controller ~]# yum install openstack-neutron openstack-neutron-ml2 \ > openstack-neutron-linuxbridge ebtables -y
【2】、配置服务组件
编辑/etc/neutron/neutron.conf 文件并完成如下操作:
[root@controller ~]# vim /etc/neutron/neutron.conf 在 [database] 部分,配置数据库访问: [database] connection = mysql+pymysql://neutron:neutron@controller/neutron 在``[DEFAULT]``部分,启用ML2插件并禁用其他插件: [DEFAULT] core_plugin = ml2 service_plugins = 在 “[DEFAULT]” 和 “[oslo_messaging_rabbit]”部分,配置 “RabbitMQ” 消息队列的连接: [DEFAULT] ... rpc_backend = rabbit [oslo_messaging_rabbit] rabbit_host = controller rabbit_userid = openstack rabbit_password = openstack 在 “[DEFAULT]” 和 “[keystone_authtoken]” 部分,配置认证服务访问: [DEFAULT] ... auth_strategy = keystone [keystone_authtoken] auth_uri = http://controller:5000 auth_url = http://controller:35357 memcached_servers = controller:11211 auth_type = password project_domain_name = default user_domain_name = default project_name = service username = neutron password = neutron 在``[DEFAULT]``和``[nova]``部分,配置网络服务来通知计算节点的网络拓扑变化: [DEFAULT] ... notify_nova_on_port_status_changes = True notify_nova_on_port_data_changes = True [nova] auth_url = http://controller:35357 auth_type = password project_domain_name = default user_domain_name = default region_name = RegionOne project_name = service username = nova password = nova 在 [oslo_concurrency] 部分,配置锁路径: [oslo_concurrency] lock_path = /var/lib/neutron/tmp
【3】、配置 Modular Layer 2 (ML2) 插件
编辑/etc/neutron/plugins/ml2/ml2_conf.ini文件并完成以下操作:
[root@controller ~]# vim /etc/neutron/plugins/ml2/ml2_conf.ini 在``[ml2]``部分,启用flat和VLAN网络: [ml2] type_drivers = flat,vlan 在``[ml2]``部分,禁用私有网络: [ml2] ... tenant_network_types = 在``[ml2]``部分,启用Linuxbridge机制: [ml2] ... mechanism_drivers = linuxbridge 在``[ml2]`` 部分,启用端口安全扩展驱动: [ml2] ... extension_drivers = port_security 在``[ml2_type_flat]``部分,配置公共虚拟网络为flat网络 [ml2] extension_drivers = port_security 在 ``[securitygroup]``部分,启用 ipset 增加安全组规则的高效性: [securitygroup] enable_ipset = True
【4】、配置Linuxbridge代理
编辑/etc/neutron/plugins/ml2/linuxbridge_agent.ini文件并且完成以下操作:
[root@controller ~]# vim /etc/neutron/plugins/ml2/linuxbridge_agent.in

在``[linux_bridge]``部分,将公共虚拟网络和公共物理网络接口对应起来:

[linux_bridge]

physical_interface_mappings = provider:eth1


在``[vxlan]``部分,禁止VXLAN覆盖网络:

[vxlan]

enable_vxlan = False


在 ``[securitygroup]``部分,启用安全组并配置 Linuxbridge iptables firewall driver:

enable_security_group = True

firewall_driver = neutron.agent.linux.iptables_firewall.IptablesFirewallDriver
【5】、配置DHCP代理
编辑/etc/neutron/dhcp_agent.ini文件并完成下面的操作:
[root@controller ~]# vim /etc/neutron/dhcp_agent.ini

在``[DEFAULT]``部分,配置Linuxbridge驱动接口,DHCP驱动并启用隔离元数据,这样在公共网络上的实例就可以通过网络来访问元数据

[DEFAULT]

interface_driver = neutron.agent.linux.interface.BridgeInterfaceDriver

dhcp_driver = neutron.agent.linux.dhcp.Dnsmasq

enable_isolated_metadata = True
(3)配置元数据代理
编辑/etc/neutron/metadata_agent.ini文件并完成以下操作:
[root@controller ~]# vim /etc/neutron/metadata_agent.ini

在``[DEFAULT]`` 部分,配置元数据主机以及共享密码:

[DEFAULT]

nova_metadata_ip = controller

metadata_proxy_shared_secret = westos   #指定共享密码为westos
(4)为计算节点配置网络服务
编辑/etc/nova/nova.conf文件并完成以下操作:
[root@controller ~]# vim /etc/nova/nova.conf

[neutron]

url = http://controller:9696

auth_url = http://controller:35357

auth_type = password

project_domain_name = default

user_domain_name = default

region_name = RegionOne

project_name = service

username = neutron

password = neutron


service_metadata_proxy = True

metadata_proxy_shared_secret = westos
(5)完成安装
【1】、网络服务初始化脚本需要一个超链接 /etc/neutron/plugin.ini指向ML2插件配置文件/etc/neutron/plugins/ml2/ml2_conf.ini。如果超链接不存在,使用下面的命令创建它:
[root@controller ~]# ln -s /etc/neutron/plugins/ml2/ml2_conf.ini /etc/neutron/plugin.ini
【2】、同步数据库,并查看数据库是否同步成功
[root@controller ~]# su -s /bin/sh -c "neutron-db-manage --config-file /etc/neutron/neutron.conf \ --config-file /etc/neutron/plugins/ml2/ml2_conf.ini upgrade head" neutron ... OK [root@controller ~]# mysql -uroot -p Enter password: #输入密码 MariaDB [(none)]> use neutron; MariaDB [neutron]> show tables; +-----------------------------------------+ | Tables_in_neutron | +-----------------------------------------+ | address_scopes | | agents | | alembic_version | | allowedaddresspairs | | arista_provisioned_nets | | arista_provisioned_tenants | | arista_provisioned_vms | | auto_allocated_topologies | | bgp_peers | | bgp_speaker_dragent_bindings | | bgp_speaker_network_bindings | | bgp_speaker_peer_bindings | | bgp_speakers | | brocadenetworks | | brocadeports | | cisco_csr_identifier_map | | cisco_hosting_devices | | cisco_ml2_apic_contracts | | cisco_ml2_apic_host_links | | cisco_ml2_apic_names | | cisco_ml2_n1kv_network_bindings | | cisco_ml2_n1kv_network_profiles | | cisco_ml2_n1kv_policy_profiles | | cisco_ml2_n1kv_port_bindings | | cisco_ml2_n1kv_profile_bindings | | cisco_ml2_n1kv_vlan_allocations | | cisco_ml2_n1kv_vxlan_allocations | | cisco_ml2_nexus_nve | | cisco_ml2_nexusport_bindings | | cisco_port_mappings | | cisco_router_mappings | | consistencyhashes | | default_security_group | | dnsnameservers | | dvr_host_macs | | externalnetworks | | extradhcpopts | | firewall_policies | | firewall_rules | | firewalls | | flavors | | flavorserviceprofilebindings | | floatingipdnses | | floatingips | | ha_router_agent_port_bindings | | ha_router_networks | | ha_router_vrid_allocations | | healthmonitors | | ikepolicies | | ipallocationpools | | ipallocations | | ipamallocationpools | | ipamallocations | | ipamavailabilityranges | | ipamsubnets | | ipavailabilityranges | | ipsec_site_connections | | ipsecpeercidrs | | ipsecpolicies | | lsn | | lsn_port | | maclearningstates | | members | | meteringlabelrules | | meteringlabels | | ml2_brocadenetworks | | ml2_brocadeports | | ml2_dvr_port_bindings | | ml2_flat_allocations | | ml2_geneve_allocations | | ml2_geneve_endpoints | | ml2_gre_allocations | | ml2_gre_endpoints | | ml2_network_segments | | ml2_nexus_vxlan_allocations | | ml2_nexus_vxlan_mcast_groups | | ml2_port_binding_levels | | ml2_port_bindings | | ml2_ucsm_port_profiles | | ml2_vlan_allocations | | ml2_vxlan_allocations | | ml2_vxlan_endpoints | | multi_provider_networks | | networkconnections | | networkdhcpagentbindings | | networkdnsdomains | | networkgatewaydevicereferences | | networkgatewaydevices | | networkgateways | | networkqueuemappings | | networkrbacs | | networks | | networksecuritybindings | | neutron_nsx_network_mappings | | neutron_nsx_port_mappings | | neutron_nsx_router_mappings | | neutron_nsx_security_group_mappings | | nexthops | | nsxv_edge_dhcp_static_bindings | | nsxv_edge_vnic_bindings | | nsxv_firewall_rule_bindings | | nsxv_internal_edges | | nsxv_internal_networks | | nsxv_port_index_mappings | | nsxv_port_vnic_mappings | | nsxv_router_bindings | | nsxv_router_ext_attributes | | nsxv_rule_mappings | | nsxv_security_group_section_mappings | | nsxv_spoofguard_policy_network_mappings | | nsxv_tz_network_bindings | | nsxv_vdr_dhcp_bindings | | nuage_net_partition_router_mapping | | nuage_net_partitions | | nuage_provider_net_bindings | | nuage_subnet_l2dom_mapping | | poolloadbalanceragentbindings | | poolmonitorassociations | | pools | | poolstatisticss | | portbindingports | | portdnses | | portqueuemappings | | ports | | portsecuritybindings | | providerresourceassociations | | qos_bandwidth_limit_rules | | qos_network_policy_bindings | | qos_policies | | qos_port_policy_bindings | | qospolicyrbacs | | qosqueues | | quotas | | quotausages | | reservations | | resourcedeltas | | router_extra_attributes | | routerl3agentbindings | | routerports | | routerroutes | | routerrules | | routers | | securitygroupportbindings | | securitygrouprules | | securitygroups | | serviceprofiles | | sessionpersistences | | standardattributes | | subnetpoolprefixes | | subnetpools | | subnetroutes | | subnets | | tags | | tz_network_bindings | | vcns_router_bindings | | vips | | vpnservices | +-----------------------------------------+ 157 rows in set (0.00 sec) MariaDB [neutron]> ^DBye #退出数据库客户端
【3】、重启计算API 服务:
[root@controller ~]# systemctl restart openstack-nova-api.service
【4】、当系统启动时,启动 Networking 服务并配置它启动。
对于两种网络选项:
[root@controller ~]# systemctl enable neutron-server.service \ > neutron-linuxbridge-agent.service neutron-dhcp-agent.service \ > neutron-metadata-agent.service [root@controller ~]# systemctl start neutron-server.service \ > neutron-linuxbridge-agent.service neutron-dhcp-agent.service \ > neutron-metadata-agent.service
查看代理是否配置成功
[root@controller ~]# neutron agent-list +----------+------------+----------+-------------------+-------+----------------+---------------+ | id | agent_type | host | availability_zone | alive | admin_state_up | binary | +----------+------------+----------+-------------------+-------+----------------+---------------+ | 054d7873 | Metadata | controll | | :-) | True | neutron- | | -d9d8 | agent | er | | | | metadata- | | -468a- | | | | | | agent | | 86bd-622 | | | | | | | | e899b6b2 | | | | | | | | d | | | | | | | | 3c56880f | DHCP agent | controll | nova | :-) | True | neutron-dhcp- | | -e307 | | er | | | | agent | | -4bfa-8f | | | | | | | | 39-547cb | | | | | | | | 2fc0313 | | | | | | | | e36e88bb | Linux | controll | | :-) | True | neutron- | | -7395-4b | bridge | er | | | | linuxbridge- | | 00-9d19- | agent | | | | | agent | | fb3fab47 | | | | | | | | 6061 | | | | | | | +----------+------------+----------+-------------------+-------+----------------+---------------+
接着继续配置计算节点:
3、Networking服务
(1)安装组件
[root@compute1 ~]# yum install openstack-neutron-linuxbridge ebtables ipset -y
(2)配置通用组件
编辑/etc/neutron/neutron.conf 文件并完成如下操作:
[root@compute1 ~]# vim /etc/neutron/neutron.conf 在 “[DEFAULT]” 和 “[oslo_messaging_rabbit]”部分,配置 “RabbitMQ” 消息队列的连接: [DEFAULT] rpc_backend = rabbit [oslo_messaging_rabbit] rabbit_host = controller rabbit_userid = openstack rabbit_password = openstack 在 “[DEFAULT]” 和 “[keystone_authtoken]” 部分,配置认证服务访问: [DEFAULT] ... auth_strategy = keystone [keystone_authtoken] auth_uri = http://controller:5000 auth_url = http://controller:35357 memcached_servers = controller:11211 auth_type = password project_domain_name = default user_domain_name = default project_name = service username = neutron password = neutron 在 [oslo_concurrency] 部分,配置锁路径: [oslo_concurrency] lock_path = /var/lib/neutron/tmp
(3)配置网络选项1:公共网络
【1】、配置Linuxbridge代理
编辑/etc/neutron/plugins/ml2/linuxbridge_agent.ini文件并且完成以下操作:
[root@compute1 ~]# vim /etc/neutron/plugins/ml2/linuxbridge_agent.ini 在``[linux_bridge]``部分,将公共虚拟网络和公共物理网络接口对应起来: [linux_bridge] physical_interface_mappings = provider:eth1 在``[vxlan]``部分,禁止VXLAN覆盖网络: [vxlan] enable_vxlan = False 在 ``[securitygroup]``部分,启用安全组并配置 Linuxbridge iptables firewall driver: [securitygroup] enable_security_group = True firewall_driver = neutron.agent.linux.iptables_firewall.IptablesFirewallDriver
(4)为计算节点配置网络服务
编辑/etc/nova/nova.conf文件并完成下面的操作:
[root@compute1 ~]# vim /etc/nova/nova.conf 在``[neutron]`` 部分,配置访问参数: [neutron] url = http://controller:9696 auth_url = http://controller:35357 auth_type = password project_domain_name = default user_domain_name = default region_name = RegionOne project_name = service username = neutron password = neutron
(5)完成安装
【1】、重启计算服务:
[root@compute1 ~]# systemctl restart openstack-nova-compute.service
【2】、启动Linuxbridge代理并配置它开机自启动:
[root@compute1 ~]# systemctl enable neutron-linuxbridge-agent.service [root@compute1 ~]# systemctl start neutron-linuxbridge-agent.service
在控制节点上:查看代理是否配置成功(是否增加了来自于compute1主机的Linux bridge agent)
[root@controller ~]# neutron agent-list +----------+------------+----------+-------------------+-------+----------------+---------------+ | id | agent_type | host | availability_zone | alive | admin_state_up | binary | +----------+------------+----------+-------------------+-------+----------------+---------------+ | 054d7873 | Metadata | controll | | :-) | True | neutron- | | -d9d8 | agent | er | | | | metadata- | | -468a- | | | | | | agent | | 86bd-622 | | | | | | | | e899b6b2 | | | | | | | | d | | | | | | | | 3c56880f | DHCP agent | controll | nova | :-) | True | neutron-dhcp- | | -e307 | | er | | | | agent | | -4bfa-8f | | | | | | | | 39-547cb | | | | | | | | 2fc0313 | | | | | | | | be3f1b28 | Linux | compute1 | | :-) | True | neutron- | | -cced-47 | bridge | | | | | linuxbridge- | | b0-b497- | agent | | | | | agent | | 3e8acd45 | | | | | | | | fb04 | | | | | | | | e36e88bb | Linux | controll | | :-) | True | neutron- | | -7395-4b | bridge | er | | | | linuxbridge- | | 00-9d19- | agent | | | | | agent | | fb3fab47 | | | | | | | | 6061 | | | | | | | +----------+------------+----------+-------------------+-------+----------------+---------------+
接下来继续配置控制节点:
6、启动一个实例
创建虚拟网络
(1)提供者网络——>创建提供者网络
【1】、在控制节点上,加载 admin 凭证来获取管理员能执行的命令访问权限:
[root@controller ~]# source admin-openrc
【2】、创建网络:
[root@controller ~]# neutron net-create --shared --provider:physical_network provider \ > --provider:network_type flat provider Created a new network: +---------------------------+--------------------------------------+ | Field | Value | +---------------------------+--------------------------------------+ | admin_state_up | True | | availability_zone_hints | | | availability_zones | | | created_at | 2019-04-19T07:27:01 | | description | | | id | d8b14128-0eab-4ad2-8f5f-9a7ffd46ed25 | | ipv4_address_scope | | | ipv6_address_scope | | | mtu | 1500 | | name | provider | | port_security_enabled | True | | provider:network_type | flat | | provider:physical_network | provider | | provider:segmentation_id | | | router:external | False | | shared | True | | status | ACTIVE | | subnets | | | tags | | | tenant_id | 0ab00c48d2b94493b654f33f2eb5a579 | | updated_at | 2019-04-19T07:27:01 | +---------------------------+--------------------------------------+
【3】、在网络上创建一个子网:
[root@controller ~]# neutron subnet-create --name provider   --allocation-pool start=172.25.83.100,end=172.25.83.200 --dns-nameserver 114.114.114.114 --gateway 172.25.83.83 provider 172.25.83.0/24

Created a new subnet:

+-------------------+----------------------------------------------------+

| Field             | Value                                              |

+-------------------+----------------------------------------------------+

| allocation_pools  | {"start": "172.25.83.100", "end": "172.25.83.200"} |

| cidr              | 172.25.83.0/24                                     |

| created_at        | 2019-04-19T07:29:20                                |

| description       |                                                    |

| dns_nameservers   | 114.114.114.114                                    |

| enable_dhcp       | True                                               |

| gateway_ip        | 172.25.83.83                                       |

| host_routes       |                                                    |

| id                | 0662303e-9eb9-4de4-94b8-488b5829d096               |

| ip_version        | 4                                                  |

| ipv6_address_mode |                                                    |

| ipv6_ra_mode      |                                                    |

| name              | provider                                           |

| network_id        | d8b14128-0eab-4ad2-8f5f-9a7ffd46ed25               |

| subnetpool_id     |                                                    |

| tenant_id         | 0ab00c48d2b94493b654f33f2eb5a579                   |

| updated_at        | 2019-04-19T07:29:20                                |

+-------------------+----------------------------------------------------+
创建m1.nano规格的主机
[root@controller ~]# openstack flavor create --id 0 --vcpus 1 --ram 64 --disk 1 m1.nano

+----------------------------+---------+

| Field                      | Value   |

+----------------------------+---------+

| OS-FLV-DISABLED:disabled   | False   |

| OS-FLV-EXT-DATA:ephemeral  | 0       |

| disk                       | 1       |

| id                         | 0       |

| name                       | m1.nano |

| os-flavor-access:is_public | True    |

| ram                        | 64      |

| rxtx_factor                | 1.0     |

| swap                       |         |

| vcpus                      | 1       |
生成一个键值对
(1)导入租户demo的凭证
[root@controller ~]# source demo-openrc
(2)生成和添加秘钥对:
[root@controller ~]# ssh-keygen -q -N "" Enter file in which to save the key (/root/.ssh/id_rsa): #直接敲击回车 [root@controller ~]# [root@controller ~]# openstack keypair create --public-key ~/.ssh/id_rsa.pub mykey +-------------+-------------------------------------------------+ | Field | Value | +-------------+-------------------------------------------------+ | fingerprint | 59:9f:db:f0:b6:b8:0d:a4:d5:5e:06:45:06:d2:96:a7 | | name | mykey | | user_id | c058d3e4f37940dc94ee618826e4ef6f |
(3)验证公钥的添加:
[root@controller ~]# openstack keypair list +-------+-------------------------------------------------+ | Name | Fingerprint | +-------+-------------------------------------------------+ | mykey | 59:9f:db:f0:b6:b8:0d:a4:d5:5e:06:45:06:d2:96:a7 | +-------+-------------------------------------------------+
增加安全组规则
(1)添加规则到 default 安全组。
-
允许 (ping):
[root@controller ~]# openstack security group rule create --proto icmp default +-----------------------+--------------------------------------+ | Field | Value | +-----------------------+--------------------------------------+ | id | c6457fa3-d12a-4003-bb38-e37c371b90d1 | | ip_protocol | icmp | | ip_range | 0.0.0.0/0 | | parent_group_id | 3ea37732-fff0-47a9-aacb-27c1eb0f736a | | port_range | | | remote_security_group | | +-----------------------+--------------------------------------+
-
允许安全 shell (SSH) 的访问:
[root@controller ~]# openstack security group rule create --proto tcp --dst-port 22 default +-----------------------+--------------------------------------+ | Field | Value | +-----------------------+--------------------------------------+ | id | aa5fb305-7a76-487e-8015-3ef693151247 | | ip_protocol | tcp | | ip_range | 0.0.0.0/0 | | parent_group_id | 3ea37732-fff0-47a9-aacb-27c1eb0f736a | | port_range | 22:22 | | remote_security_group | | +-----------------------+--------------------------------------+
启动一个实例——>在公有网络上创建实例
(1)确定实例选项
【1】、在控制节点上,获得 demo 凭证
[root@controller ~]# source demo-openrc
【2】、一个实例指定了虚拟机资源的大致分配,包括处理器、内存和存储。
列出可用类型:
[root@controller ~]# openstack flavor list

+----+-----------+-------+------+-----------+-------+-----------+

| ID | Name      |   RAM | Disk | Ephemeral | VCPUs | Is Public |

+----+-----------+-------+------+-----------+-------+-----------+

| 0  | m1.nano   |    64 |    1 |         0 |     1 | True      |

| 1  | m1.tiny   |   512 |    1 |         0 |     1 | True      |

| 2  | m1.small  |  2048 |   20 |         0 |     1 | True      |

| 3  | m1.medium |  4096 |   40 |         0 |     2 | True      |

| 4  | m1.large  |  8192 |   80 |         0 |     4 | True      |

| 5  | m1.xlarge | 16384 |  160 |         0 |     8 | True      |

+----+-----------+-------+------+-----------+-------+-----------+
【3】、列出可用镜像:
[root@controller ~]# openstack image list

+--------------------------------------+--------+--------+

| ID                                   | Name   | Status |

+--------------------------------------+--------+--------+

| fe68d600-2b20-45de-8391-2d3eecdaca4e | cirros | active |

+--------------------------------------+--------+--------+
【4】、列出可用网络:
[root@controller ~]# openstack network list

+--------------------------------------+----------+--------------------------------------+

| ID                                   | Name     | Subnets                              |

+--------------------------------------+----------+--------------------------------------+

| d8b14128-0eab-4ad2-8f5f-9a7ffd46ed25 | provider | 0662303e-9eb9-4de4-94b8-488b5829d096 |

+--------------------------------------+----------+--------------------------------------+
【5】、列出可用的安全组:
[root@controller ~]#  openstack security group list

+--------------------------+---------+------------------------+---------------------------+

| ID                       | Name    | Description            | Project                   |

+--------------------------+---------+------------------------+---------------------------+

| 3ea37732-fff0-47a9-aacb- | default | Default security group | 4bf385a6bf92458194acf7a2f |

| 27c1eb0f736a             |         |                        | aef794b                   |

+--------------------------+---------+------------------------+---------------------------+
(2)创建实例
【1】、启动实例:
[root@controller ~]# openstack server create --flavor m1.nano --image cirros --nic net-id=d8b14128-0eab-4ad2-8f5f-9a7ffd46ed25 --security-group default --key-name mykey server1+--------------------------------------+-----------------------------------------------+
| Field | Value |
+--------------------------------------+-----------------------------------------------+
| OS-DCF:diskConfig | MANUAL |
| OS-EXT-AZ:availability_zone | |
| OS-EXT-STS:power_state | 0 |
| OS-EXT-STS:task_state | scheduling |
| OS-EXT-STS:vm_state | building |
| OS-SRV-USG:launched_at | None |
| OS-SRV-USG:terminated_at | None |
| accessIPv4 | |
| accessIPv6 | |
| addresses | |
| adminPass | k9Bw95Z3dpMv |
| config_drive | |
| created | 2019-04-19T08:09:18Z |
| flavor | m1.nano (0) |
| hostId | |
| id | 5d7c18d4-d9d4-4edf-a0b6-0503b31421db |
| image | cirros (fe68d600-2b20-45de-8391-2d3eecdaca4e) |
| key_name | mykey |
| name | server1 |
| os-extended-volumes:volumes_attached | [] |
| progress | 0 |
| project_id | 4bf385a6bf92458194acf7a2faef794b |
| properties | |
| security_groups | [{u'name': u'default'}] |
| status | BUILD |
| updated | 2019-04-19T08:09:19Z |
| user_id | c058d3e4f37940dc94ee618826e4ef6f |
+--------------------------------------+-----------------------------------------------+
【2】、检查实例的状态:
[root@controller ~]# openstack server list +--------------------------------------+---------+--------+------------------------+ | ID | Name | Status | Networks | +--------------------------------------+---------+--------+------------------------+ | 5d7c18d4-d9d4-4edf-a0b6-0503b31421db | server1 | ACTIVE | provider=172.25.83.101 | +--------------------------------------+---------+--------+------------------------+
(3)使用虚拟控制台访问实例
【1】、获取你实例的 会话URL并从web浏览器访问它:
[root@controller ~]# openstack console url show server1 +-------+---------------------------------------------------------------------------------+ | Field | Value | +-------+---------------------------------------------------------------------------------+ | type | novnc | | url | http://controller:6080/vnc_auto.html?token=79076f9f-4af0-41e5-b122-f008ce471f88 | +-------+---------------------------------------------------------------------------------+
【2】、浏览器访问该url
在物理机的本地解析文件中添加controller的解析(这是因为要在物理机的浏览器中进行访问)
[root@foundation83 ~]# vim /etc/hosts

172.25.83.1     controller
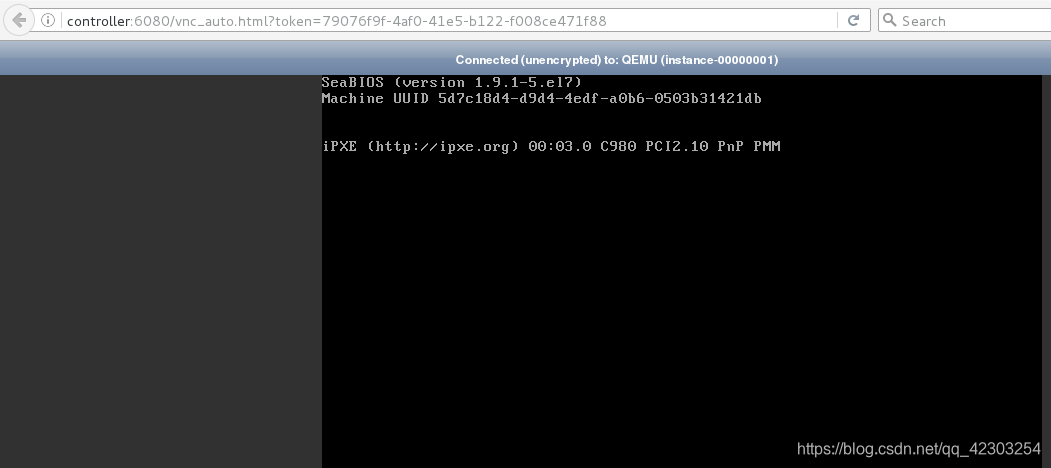
从上图,我们可以看到该实例有问题。导致这个问题的原因在于centos7.3源中的qemu1.5版本低,更新一下qemu版本即可。解决方法如下:参见博客(https://blog.csdn.net/wjciayf/article/details/73741146)
在计算节点上进行操作:
[root@compute1 ~]# virsh version Compiled against library: libvirt 2.0.0 Using library: libvirt 2.0.0 Using API: QEMU 2.0.0 Running hypervisor: QEMU 1.5.3 [root@compute1 ~]# ls #在网上下载关于qemu的软件 qemu [root@compute1 ~]# cd qemu/ [root@compute1 qemu]# ls libcacard-2.5.2-2.1.el7.x86_64.rpm qemu-kvm-common-ev-2.6.0-28.el7.10.1.x86_64.rpm qemu-img-ev-2.6.0-28.el7.10.1.x86_64.rpm qemu-kvm-ev-2.6.0-28.el7.10.1.x86_64.rpm [root@compute1 qemu]# yum install * -y [root@compute1 qemu]# virsh version Compiled against library: libvirt 2.0.0 Using library: libvirt 2.0.0 Using API: QEMU 2.0.0 Running hypervisor: QEMU 2.6.0 #可以看到版本由原来的1.5.3变为了现在的2.6.0
在控制节点上:重启server1
[root@controller ~]# openstack server stop server1 [root@controller ~]# openstack server list +----------------------+---------+---------+-----------------------+ | ID | Name | Status | Networks | +----------------------+---------+---------+-----------------------+ | 5d7c18d4-d9d4-4edf- | server1 | SHUTOFF | provider=172.25.83.10 | | a0b6-0503b31421db | | | 1 | +----------------------+---------+---------+-----------------------+ [root@controller ~]# openstack server start server1 [root@controller ~]# openstack server list +-----------------------+---------+--------+-----------------------+ | ID | Name | Status | Networks | +-----------------------+---------+--------+-----------------------+ | 5d7c18d4-d9d4-4edf- | server1 | ACTIVE | provider=172.25.83.10 | | a0b6-0503b31421db | | | 1 | +-----------------------+---------+--------+-----------------------+ [root@controller ~]# openstack console url show server1 +-------+----------------------------------------------------------+ | Field | Value | +-------+----------------------------------------------------------+ | type | novnc | | url | http://controller:6080/vnc_auto.html?token=b022d4aa- | | | 37ea-459b-a3ff-2049db66333e | +-------+----------------------------------------------------------+
在浏览器访问这个新的url
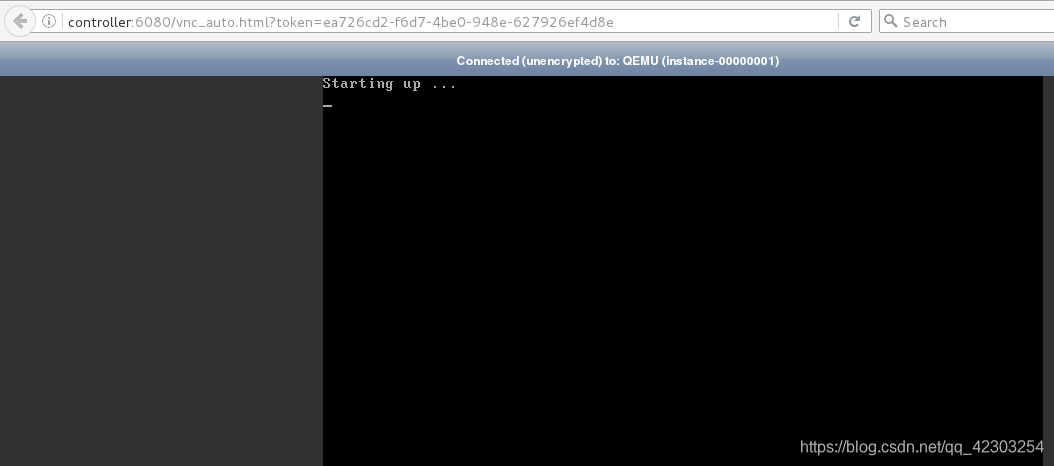
从上图,我们可以看到该实例有问题。、解决方法如下:参见博客(https://blog.csdn.net/a610616898/article/details/69788360)
在计算节点上进行操作:
[root@compute1 ~]# vim /etc/nova/nova.conf [libvirt] virt_type = qemu cpu_mode = none #新添加的内容 [root@compute1 ~]# systemctl restart openstack-nova-compute #修改完配置文件之后,重启服务
在控制节点上:重启server1
[root@controller ~]# openstack server stop server1 [root@controller ~]# openstack server list +----------------------+---------+---------+-----------------------+ | ID | Name | Status | Networks | +----------------------+---------+---------+-----------------------+ | 5d7c18d4-d9d4-4edf- | server1 | SHUTOFF | provider=172.25.83.10 | | a0b6-0503b31421db | | | 1 | +----------------------+---------+---------+-----------------------+ [root@controller ~]# openstack server start server1 [root@controller ~]# openstack server list +-----------------------+---------+--------+-----------------------+ | ID | Name | Status | Networks | +-----------------------+---------+--------+-----------------------+ | 5d7c18d4-d9d4-4edf- | server1 | ACTIVE | provider=172.25.83.10 | | a0b6-0503b31421db | | | 1 | +-----------------------+---------+--------+-----------------------+ [root@controller ~]# openstack console url show server1 +-------+---------------------------------------------------------------------------------+ | Field | Value | +-------+---------------------------------------------------------------------------------+ | type | novnc | | url | http://controller:6080/vnc_auto.html?token=46662814-8a2c-49dd-910a-47e5606a4993 | +-------+---------------------------------------------------------------------------------+
在浏览器访问这个新的url
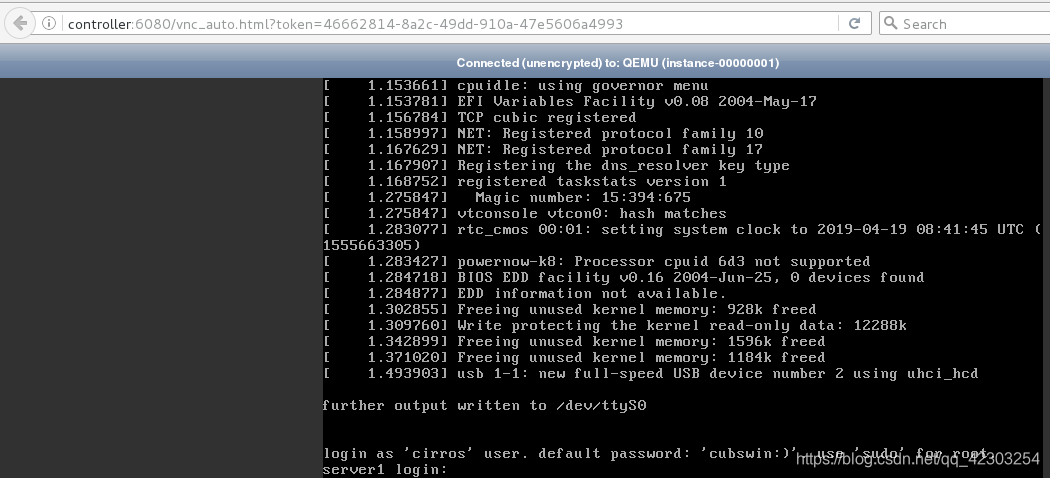
出现上图表示我们配置成功。
以“cirrors”用户的身份,“cubswin:)“密码,进行登陆
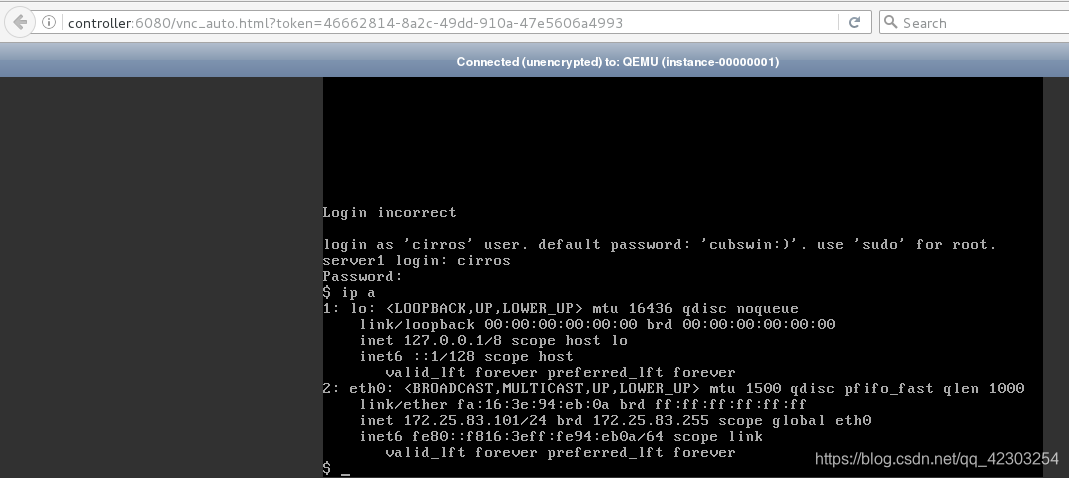
从上图,我们可以看到server1分配到的ip为172.25.83.101。
在web界面登陆成功之后,我们可以在远程利用ssh的方式,进行免密连接
[root@controller ~]# ssh cirros@172.25.83.101 The authenticity of host '172.25.83.101 (172.25.83.101)' can't be established. RSA key fingerprint is 1e:bd:0e:10:4c:cb:d5:b5:d2:79:51:91:d9:ed:f3:9c. Are you sure you want to continue connecting (yes/no)? yes Warning: Permanently added '172.25.83.101' (RSA) to the list of known hosts. $ ip a 1: lo:mtu 16436 qdisc noqueue link/loopback 00:00:00:00:00:00 brd 00:00:00:00:00:00 inet 127.0.0.1/8 scope host lo inet6 ::1/128 scope host valid_lft forever preferred_lft forever 2: eth0: mtu 1500 qdisc pfifo_fast qlen 1000 link/ether fa:16:3e:94:eb:0a brd ff:ff:ff:ff:ff:ff inet 172.25.83.101/24 brd 172.25.83.255 scope global eth0 inet6 fe80::f816:3eff:fe94:eb0a/64 scope link valid_lft forever preferred_lft forever $ ping 172.25.83.2 PING 172.25.83.2 (172.25.83.2): 56 data bytes 64 bytes from 172.25.83.2: seq=0 ttl=64 time=1.136 ms ^C --- 172.25.83.2 ping statistics --- 1 packets transmitted, 1 packets received, 0% packet loss round-trip min/avg/max = 1.136/1.136/1.136 ms
下面我们再创建一个云主机server2
[root@controller ~]# openstack server create --flavor m1.nano --image cirros --nic net-id=d8b14128-0eab-4ad2-8f5f-9a7ffd46ed25 --security-group default --key-name mykey server2
+--------------------------------------+-----------------------------------------------+
| Field | Value |
+--------------------------------------+-----------------------------------------------+
| OS-DCF:diskConfig | MANUAL |
| OS-EXT-AZ:availability_zone | |
| OS-EXT-STS:power_state | 0 |
| OS-EXT-STS:task_state | scheduling |
| OS-EXT-STS:vm_state | building |
| OS-SRV-USG:launched_at | None |
| OS-SRV-USG:terminated_at | None |
| accessIPv4 | |
| accessIPv6 | |
| addresses | |
| adminPass | 3Lme7tei4JDE |
| config_drive | |
| created | 2019-04-19T09:08:50Z |
| flavor | m1.nano (0) |
| hostId | |
| id | 28aa033b-db84-4497-abef-34e6e5c1d949 |
| image | cirros (fe68d600-2b20-45de-8391-2d3eecdaca4e) |
| key_name | mykey |
| name | server2 |
| os-extended-volumes:volumes_attached | [] |
| progress | 0 |
| project_id | 4bf385a6bf92458194acf7a2faef794b |
| properties | |
| security_groups | [{u'name': u'default'}] |
| status | BUILD |
| updated | 2019-04-19T09:08:50Z |
| user_id | c058d3e4f37940dc94ee618826e4ef6f |
+--------------------------------------+-----------------------------------------------+
[root@controller ~]# openstack server list +--------------------------------------+---------+--------+------------------------+ | ID | Name | Status | Networks | +--------------------------------------+---------+--------+------------------------+ | 28aa033b-db84-4497-abef-34e6e5c1d949 | server2 | ACTIVE | provider=172.25.83.102 | | 5d7c18d4-d9d4-4edf-a0b6-0503b31421db | server1 | ACTIVE | provider=172.25.83.101 | +--------------------------------------+---------+--------+------------------------+ [root@controller ~]# openstack console url show server2 +-------+---------------------------------------------------------------------------------+ | Field | Value | +-------+---------------------------------------------------------------------------------+ | type | novnc | | url | http://controller:6080/vnc_auto.html?token=31353e55-4682-4d84-a56a-7fd4364e8b22 | +-------+---------------------------------------------------------------------------------+
在浏览器访问server2的url
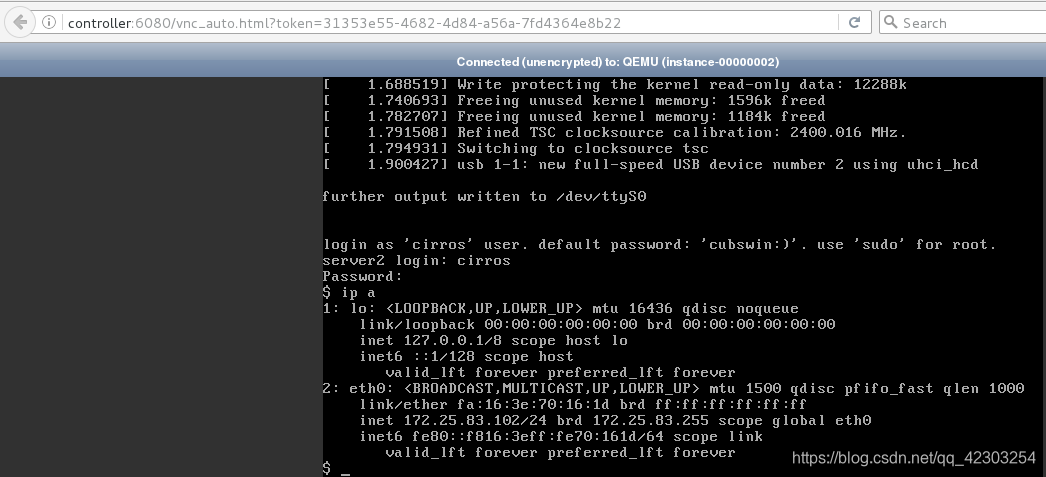
从上图,我们可以看到server2分配到的ip为172.25.83.102。
在web界面登陆成功之后,我们可以在远程利用ssh的方式,进行免密连接
#在真机对iptables进行设置,使得虚拟机可以上网 [root@foundation83 ~]# iptables -t nat -I POSTROUTING -s 172.25.83.0/24 -j MASQUERADE
[root@controller ~]# ssh cirros@172.25.83.102 The authenticity of host '172.25.83.102 (172.25.83.102)' can't be established. RSA key fingerprint is 54:cb:b0:70:16:0f:d4:f7:77:ab:d8:cd:4c:04:a8:e3. Are you sure you want to continue connecting (yes/no)? yes Warning: Permanently added '172.25.83.102' (RSA) to the list of known hosts. $ ip a 1: lo:mtu 16436 qdisc noqueue link/loopback 00:00:00:00:00:00 brd 00:00:00:00:00:00 inet 127.0.0.1/8 scope host lo inet6 ::1/128 scope host valid_lft forever preferred_lft forever 2: eth0: mtu 1500 qdisc pfifo_fast qlen 1000 link/ether fa:16:3e:70:16:1d brd ff:ff:ff:ff:ff:ff inet 172.25.83.102/24 brd 172.25.83.255 scope global eth0 inet6 fe80::f816:3eff:fe70:161d/64 scope link valid_lft forever preferred_lft forever $ ping 172.25.83.101 PING 172.25.83.101 (172.25.83.101): 56 data bytes 64 bytes from 172.25.83.101: seq=0 ttl=64 time=7.321 ms ^C --- 172.25.83.101 ping statistics --- 1 packets transmitted, 1 packets received, 0% packet loss round-trip min/avg/max = 7.321/7.321/7.321 ms PING www.baidu.com (220.181.112.244): 56 data bytes 64 bytes from 220.181.112.244: seq=0 ttl=50 time=24.378 ms 64 bytes from 220.181.112.244: seq=1 ttl=50 time=23.232 ms ^C --- www.baidu.com ping statistics --- 2 packets transmitted, 2 packets received, 0% packet loss round-trip min/avg/max = 23.232/23.805/24.378 ms
在计算节点端可以看到开启了几个云主机
[root@compute1 ~]# virsh list Id Name State ---------------------------------------------------- 3 instance-00000001 running 4 instance-00000002 running
至此关于Linux系统部署OpenStack的教程分享结束,欢迎大家在评论区留言。
以上就是为各位朋友分享的相关内容。想要了解更多Linux相关知识记得关注公众号“良许Linux”,或扫描下方二维码进行关注,更多等着你!

 微信扫一扫打赏
 支付宝扫一扫打赏

.png)

.jpg)