

本篇文章旨在分享如何在嵌入式Linux设备上开启无线AP/无线接入点(Wireless Access Point)的方法。
什么情况下需要使用无线AP?
在我的最近工作中,遇到了以下两种情况需要使用无线AP:
-
AP配网:当设备需要进行热点配网时,智能硬件可以处于AP模式,手机作为STA连接到智能硬件所创建的AP上,从而形成局域网。这样,手机就可以通过局域网将设备即将连接的路由器的SSID和密码信息传输给智能硬件,智能硬件接收后,连接到路由器,完成配网过程。
-
使用废旧的板子作为无线AP组建设备的局域网通信:在移动机器人的开发过程中,无线调试是非常便利的。由于设备始终处于运动状态,通过有线方式与电脑连接需要跟随设备移动,非常不便。另外,在调试过程中,对路由器的需求较大,而路由器资源有限。因此,我将废旧的板子配置为无线AP模式,作为设备间局域网通信的解决方案。
经过实测,相同距离下,废旧板子作为AP的局域网通信速度略低于我们的路由器,但不影响我们进行调试使用。
嵌入式Linux设备,要开启无线接入点需要准备如下四个文件:
-
hostapd:一个用户态用于AP和认证服务器的守护进程。 -
hostapd.conf:hostapd配置文件,包含无线AP的名称、密码等信息。 -
udhcpd:dhcp拨号的服务器端。 -
udhcpd.conf:udhcpd配置文件,配置网关地址及IP地址的范围。
其中,hostapd、udhcpd工具busybox中包含有。当然,也可以自己下载源码进行编译,方法可参照我们往期的博文:
RTL8723驱动移植+wpa_supplicant移植+SSH移植,编译方法都是大同小异的。
注意区分:udhcpc、udhcpd工具。
-
udhcpc是dhcp拨号的客户端。设备作为STA时,用于自动获取IP。 -
udhcpd是dhcp拨号的服务器端。设备作为AP时,用于自动分配IP。
其中,我们的往期博文如何实现程序开机自启动?中有用到udhcpc,本博文中我们用的是udhcpd。
下面我们来看hostapd及udhcpd的配置文件如何配置:
hostapd配置文件
hostapd的配置文件可参考hostapd源码下的hostapd.conf:

里面的内容很多,实际中我们可能用不到那么多配置,我们可以删减、修改,只保留我们所需的配置。
我们删减修改之后得到:
*左右滑动查看全部代码>>>*
# AP netdevice name
interface=wlan0

# SSID to be used in IEEE 802.11 management frames
ssid=LinuxZn_AP

# Driver interface type (hostap/wired/none/nl80211/bsd);
# default: hostap). nl80211 is used with all Linux mac80211 drivers.
# Use driver=none if building hostapd as a standalone RADIUS server that does
# not control any wireless/wired driver.
driver=nl80211

# Interface for separate control program.
# /var/run/hostapd is the recommended directory for sockets and by default,
# hostapd_cli will use it when trying to connect with hostapd.
ctrl_interface=/var/run/hostapd

# Channel number (IEEE 802.11)
channel=5

# ieee80211n: Whether IEEE 802.11n (HT) is enabled
# 0 = disabled (default)
# 1 = enabled
# Note: You will also need to enable WMM for full HT functionality.
# Note: hw_mode=g (2.4 GHz) and hw_mode=a (5 GHz) is used to specify the band.
ieee80211n=1
hw_mode=g

# Send empty SSID in beacons and ignore probe request frames that do not
# specify full SSID, i.e., require stations to know SSID.
# default: disabled (0)
# 1 = send empty (length=0) SSID in beacon and ignore probe request for
#     broadcast SSID
# 2 = clear SSID (ASCII 0), but keep the original length (this may be required
#     with some clients that do not support empty SSID) and ignore probe
#     requests for broadcast SSID
ignore_broadcast_ssid=0

# WPA/IEEE 802.11i configuration
wpa=2
wpa_passphrase=12345678
wpa_key_mgmt=WPA-PSK
rsn_pairwise=CCMP
该文件主要配置了:
-
所用网卡:wlan0 -
AP名称:LinuxZn_AP -
AP密码:12345678 -
加密:WPA2 -
频段:2.4GHz
我们把hostapd.conf配置文件我们放到板子上的/etc目录下备用:

udhcpd配置文件
udhcpd的配置文件可参考udhcpd源码下的udhcpd.conf:
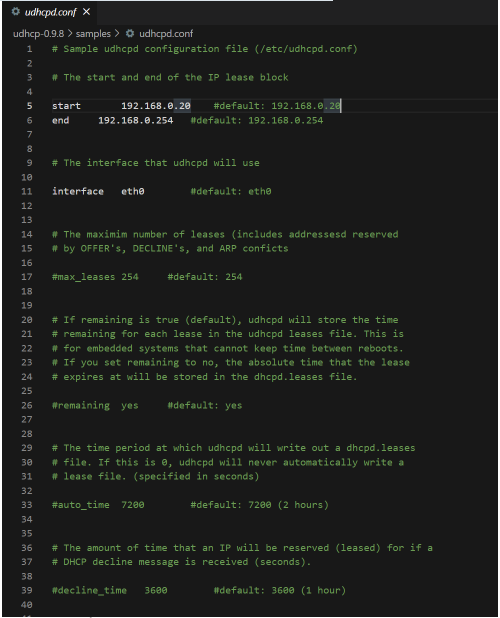
同样的,我们只保留如下内容:
*左右滑动查看全部代码>>>*
# The start and end of the IP lease block
start           192.168.3.2
end             192.168.3.254

# The interface that udhcpd will use
interface       wlan0

opt     dns     114.114.114.114
option  subnet  255.255.255.0
opt     router  192.168.3.1
option  domain  local
option  lease   864000     # 10 days of seconds
该文件主要配置了:
-
所能分配的IP地址的范围为:192.168.3.2~192.168.3.254 -
网卡接口:wlan0 -
网关地址:192.168.3.1
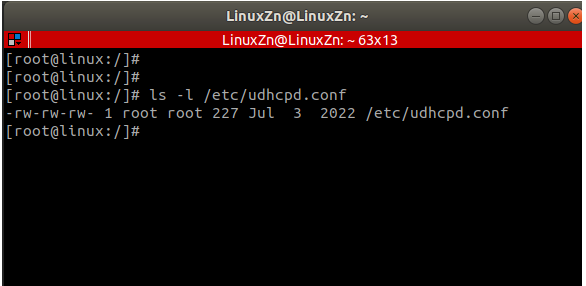
我们把udhcpd.conf配置文件放到板子上的/etc目录下备用:
开启热点
有了以上工具及相关配置文件之后,还需要进行一些操作,才可以开启我们的热点,我们把这些操作写成脚本:
start_ap.sh:
*左右滑动查看全部代码>>>*
#!/bin/bash

# 杀掉网卡操作相关的进程
killall wpa_supplicant udhcpc dhcpcd dnsmasq udhcpd hostapd > /dev/null 2>&1

# 禁用网卡
ifconfig wlan0 down

# 启用网卡
ifconfig wlan0 up

# 给无线网卡设置IP地址(网关地址)
ifconfig wlan0 192.168.3.1

# 启动DHCP
udhcpd /etc/udhcpd.conf

# 启动热点
hostapd /etc/hostapd.conf -B
开启热点:
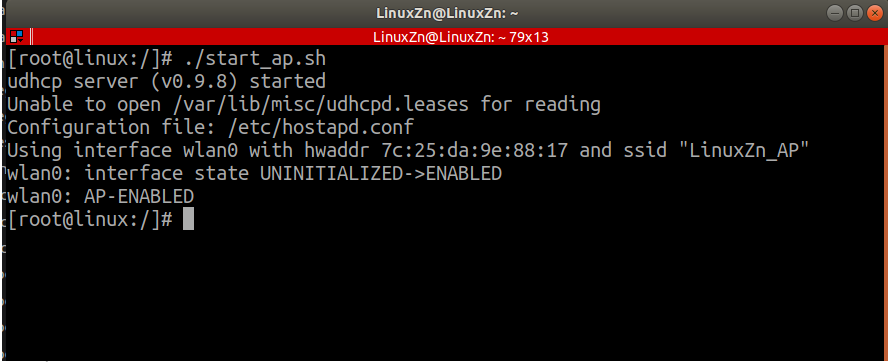
连接测试:

可见,手机分配到的IP为192.168.3.2,属于192.168.3.2~192.168.3.254的范围,我们的设备热点开启成功!我们的PC可以连接这个热点对设备进行调试。
以上就是良许教程网为各位朋友分享的Linu系统相关内容。想要了解更多Linux相关知识记得关注公众号“良许Linux”,或扫描下方二维码进行关注,更多干货等着你 !

 微信扫一扫打赏
 支付宝扫一扫打赏

.png)

.jpg)